











From Home Assistant 2026.11, SunEnergyXT plugins are installed with the Marketplace built into Home Assistant, HACS is no longer needed. The screenshots show the SunEnergyXT-BK plugin as an example. The steps are the same for all SunEnergyXT plugins, only the GitHub link and the plugin name differ, see the table below.
Before You Begin
1. Check your Home Assistant version: click "Settings" in the left sidebar, then click "About". The version is shown on this page.
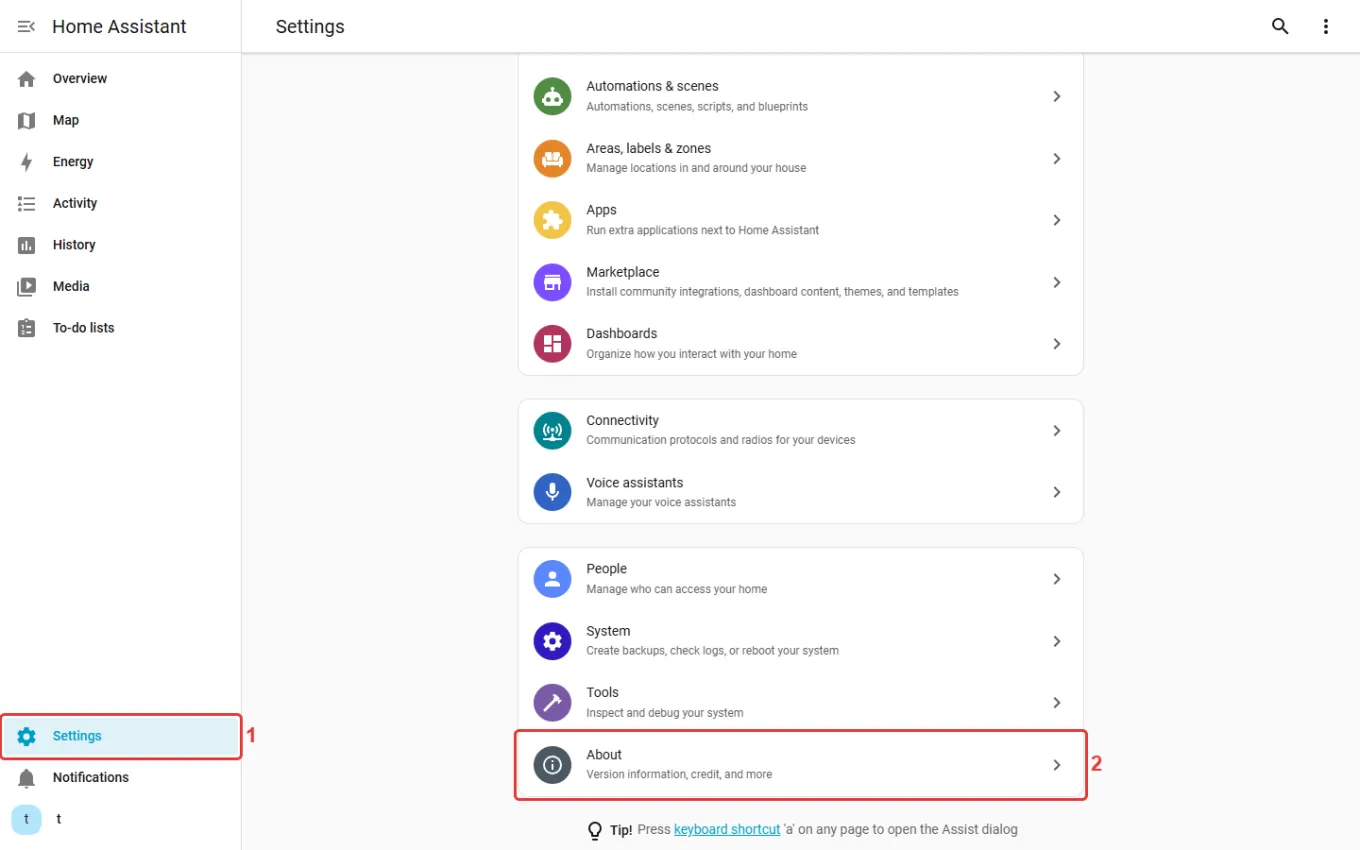
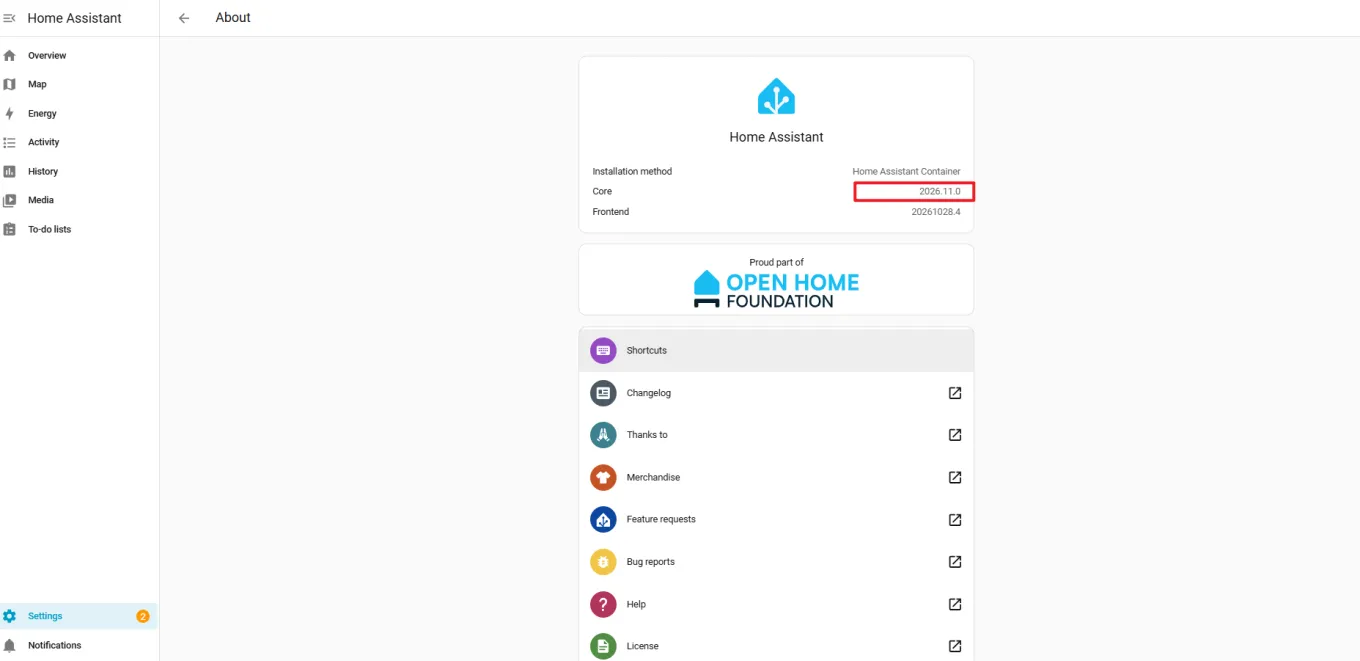
2. This guide applies to Home Assistant 2026.11 and later. For earlier versions, follow the HACS steps in the integration guide of your device.
3. Make sure Home Assistant is connected to the internet.
Plugin information
| Device | Plugin name | GitHub link |
|---|---|---|
| BK215 / BK215 Plus | SunEnergyXT-BK | https://github.com/SunEnergyXT/SunEnergyXT-BK |
| SunEnergyXT 500 / 500 Pro | SunEnergyXT 500 Series | https://github.com/SunEnergyXT/SunEnergyXT-500-Series |
| Deye micro inverter | Solarman SunEnergyXT | https://github.com/SunEnergyXT/solarman-sunenergyxt |
Step 1 | Add the plugin to the Marketplace
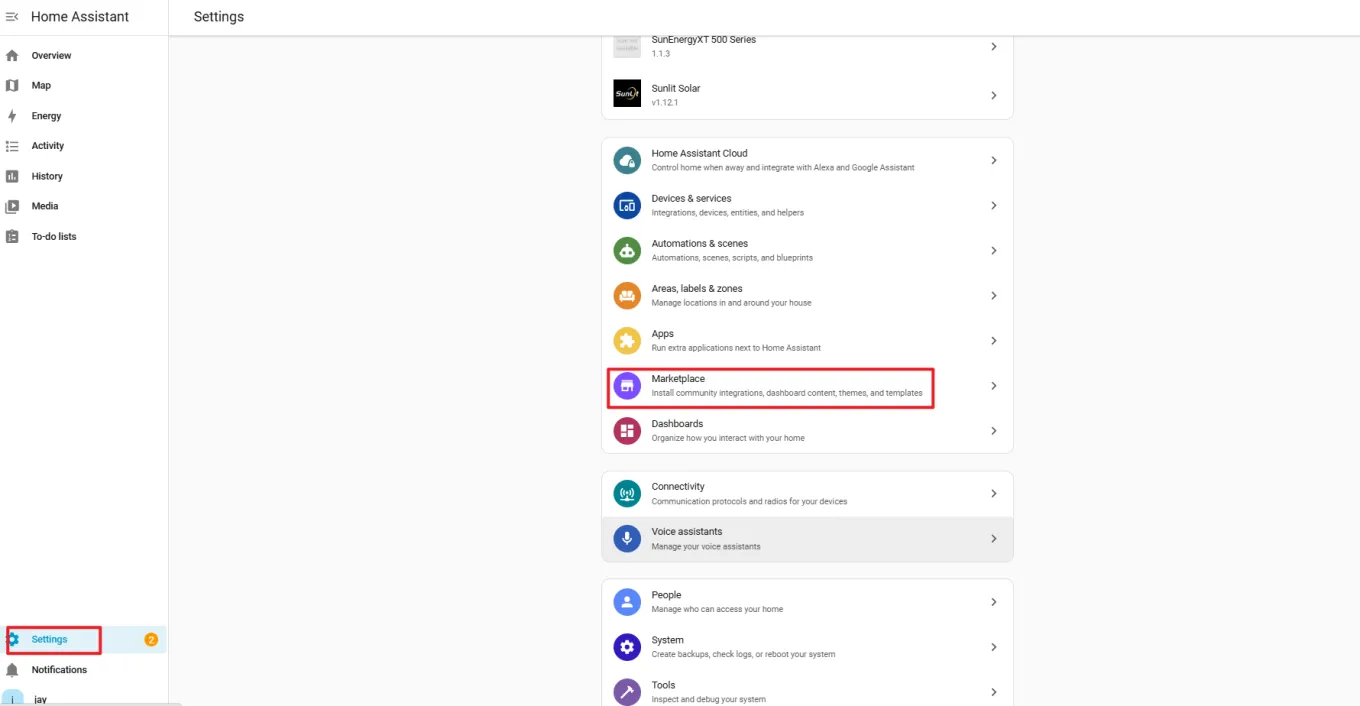
1. Click "Settings" in the left sidebar, then click "Marketplace".
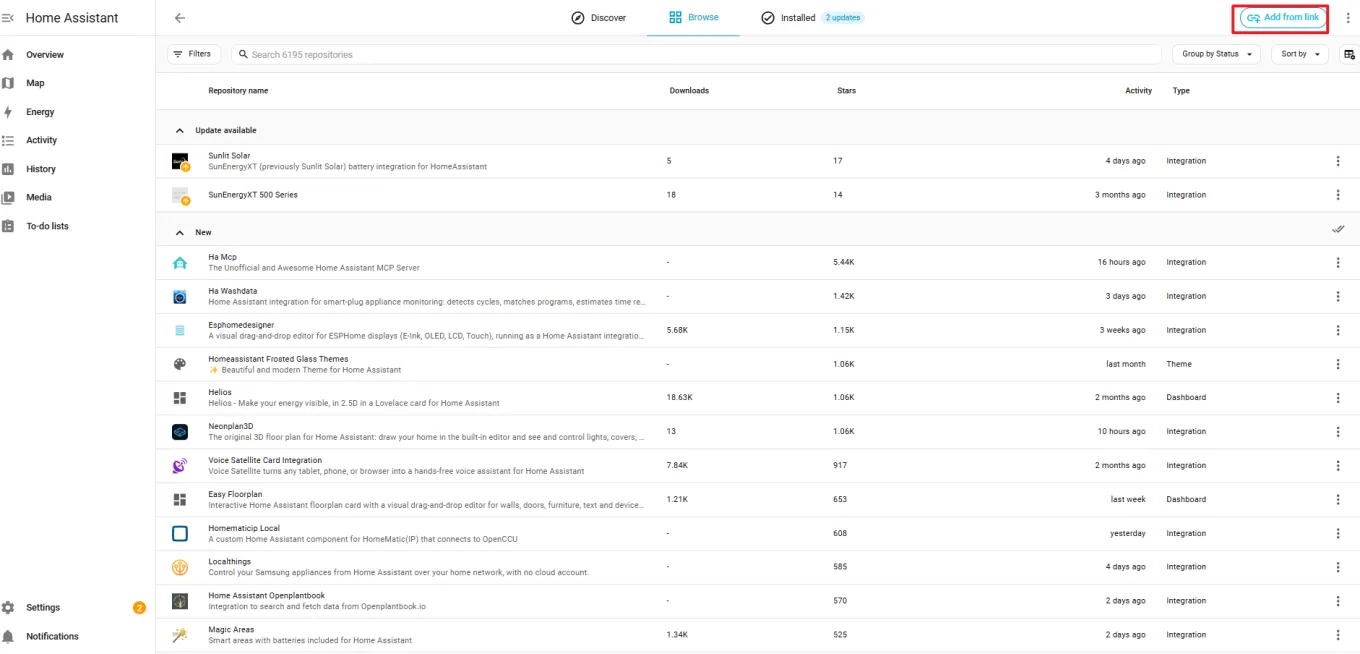
2. Click "Add from link" in the top right corner.
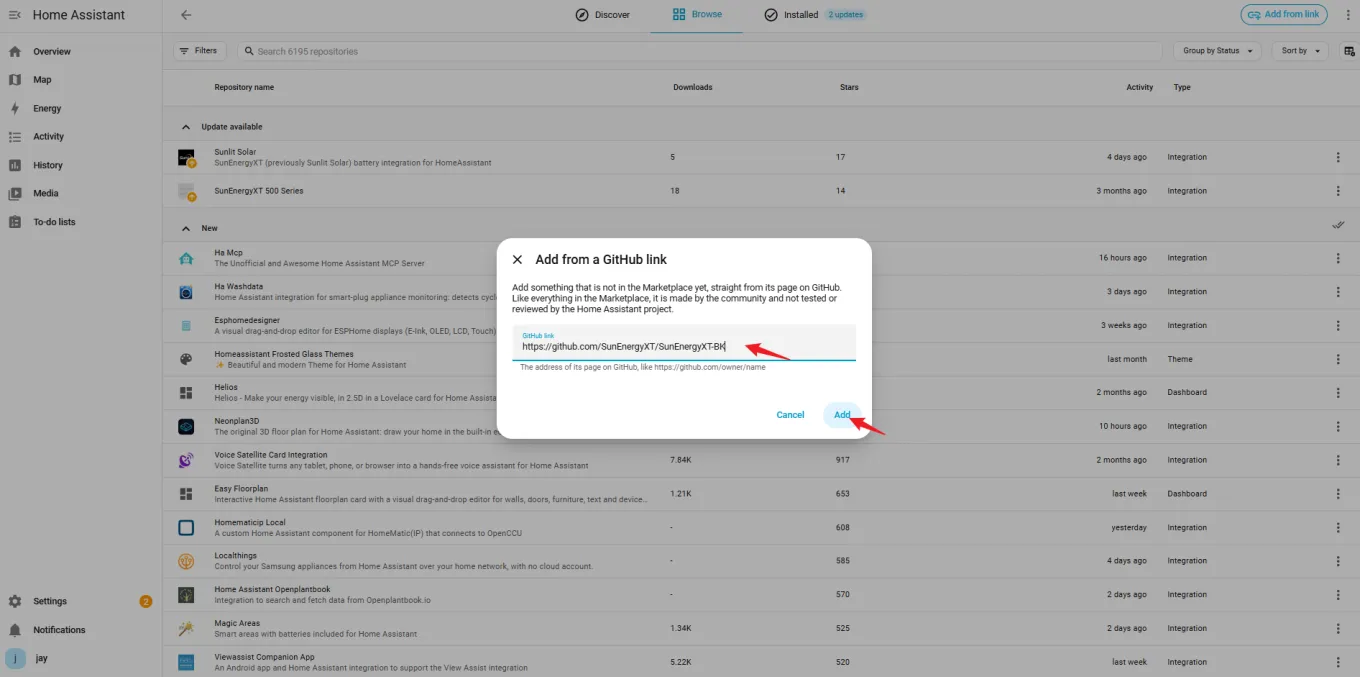
3. Enter the GitHub link of your plugin from the table above, then click "Add". The type of the plugin is recognized automatically. Example: https://github.com/SunEnergyXT/SunEnergyXT-BK
Step 2 | Install the Plugin
1. Enter the plugin name from the table above in the search box, for example "SunEnergyXT-BK".
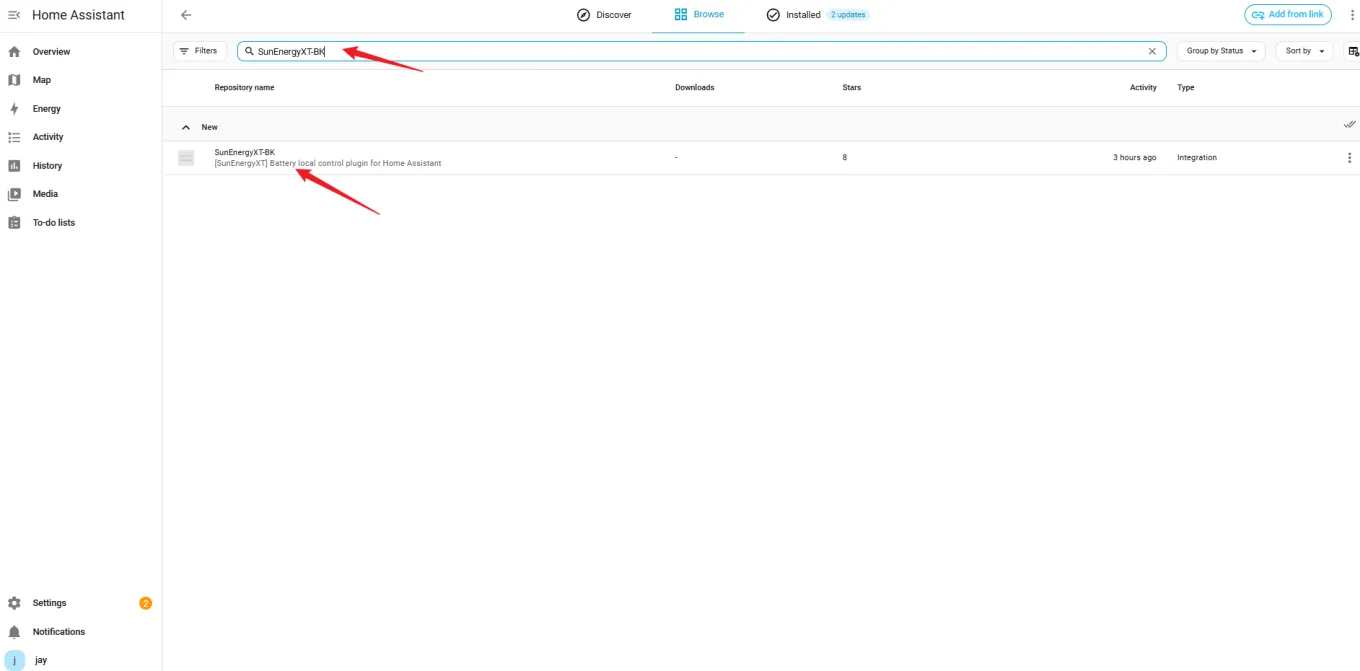
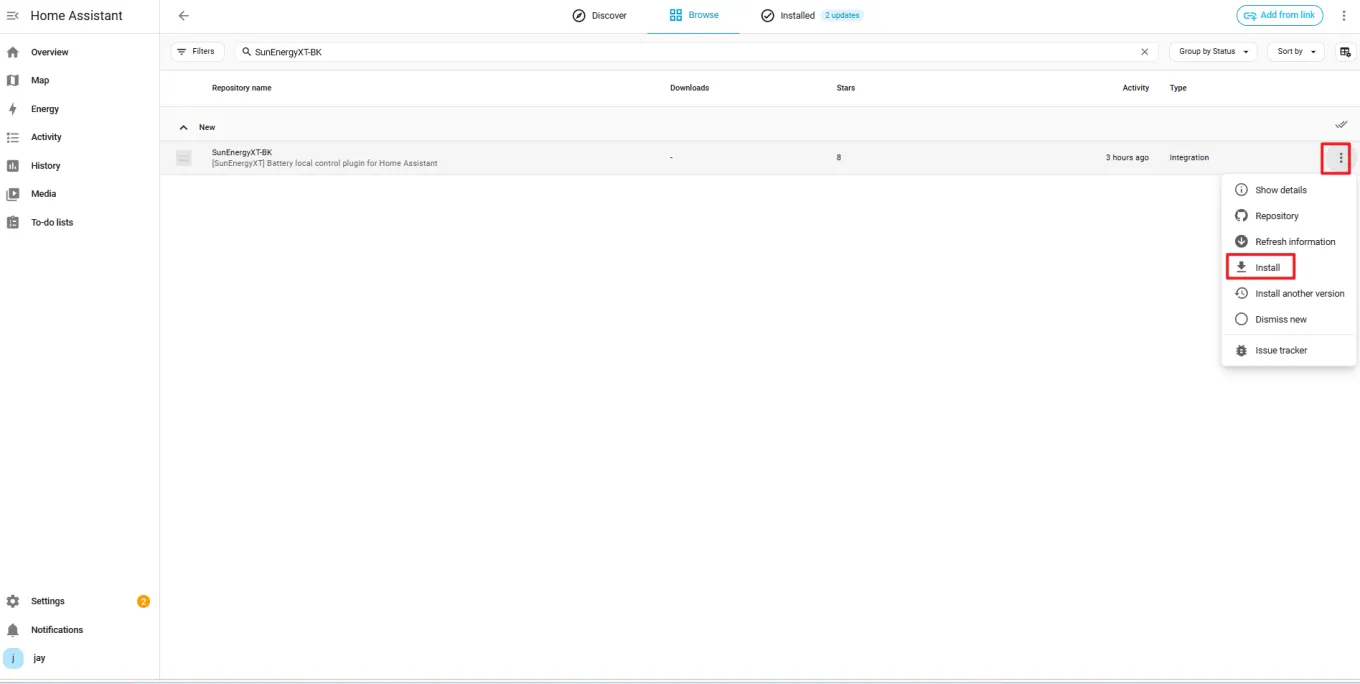
2. Click the more icon (⋮) of the plugin and select "Install".
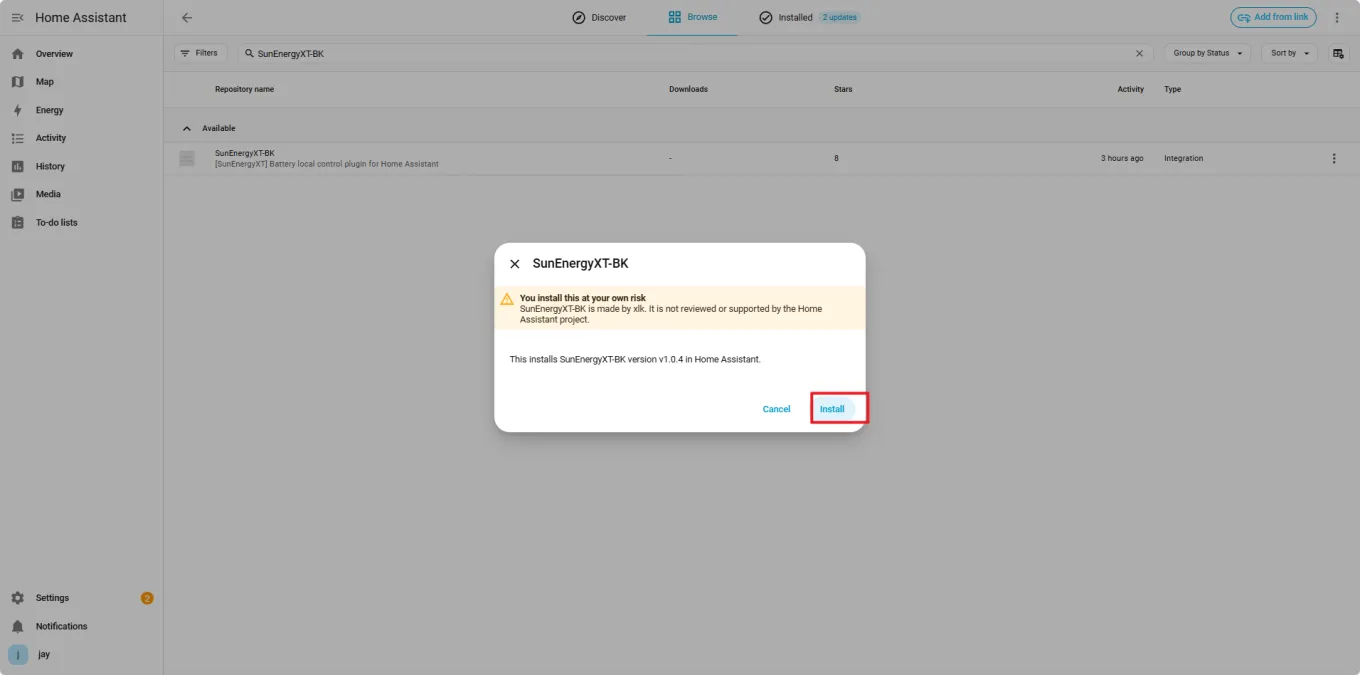
3. Confirm with "Install" in the pop-up window and wait for the installation to finish.
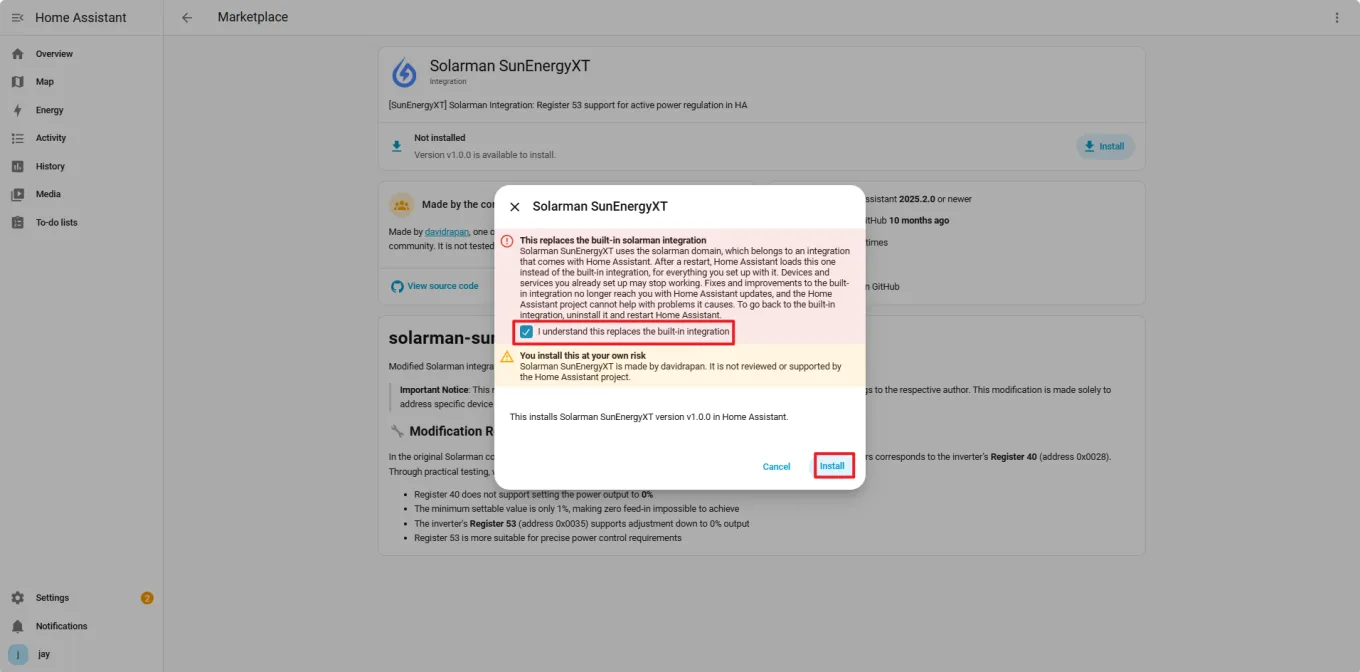
Solarman SunEnergyXT only: the plugin replaces the Solarman integration that comes with Home Assistant. The pop-up window shows a confirmation, tick "I understand this replaces the built-in integration", then click "Install". After the installation, restart Home Assistant. This confirmation and the restart are not needed for SunEnergyXT-BK and SunEnergyXT 500 Series.
Next Step
Go back to the integration guide of your device and continue with the step after installing the plugin.
