

Make sure the following requirements are met before proceeding:
1. Install Home Assistant
Please visit: https://www.home-assistant.io/installation/
2. Complete Home Assistant Onboarding
Please visit: https://www.home-assistant.io/getting-started/onboarding/
Deye microinverter / APS microinverter
ShellyPro3EM / Shelly3EM
BK215 / BK215 Plus
If any of these devices have not been integrated yet, please follow the corresponding guides below:
4. Important notice
Please ensure that the Deye microinverter, APS microinverter, Shelly, BK215/BK215 Plus, and Home Assistant are all connected to the same local area network.
5. Access the Home Assistant web interface.
Open a web browser on your computer and go to: http://homeassistant.local:8123
Steps to Create the Automation
Step 1 | Import the Blueprint
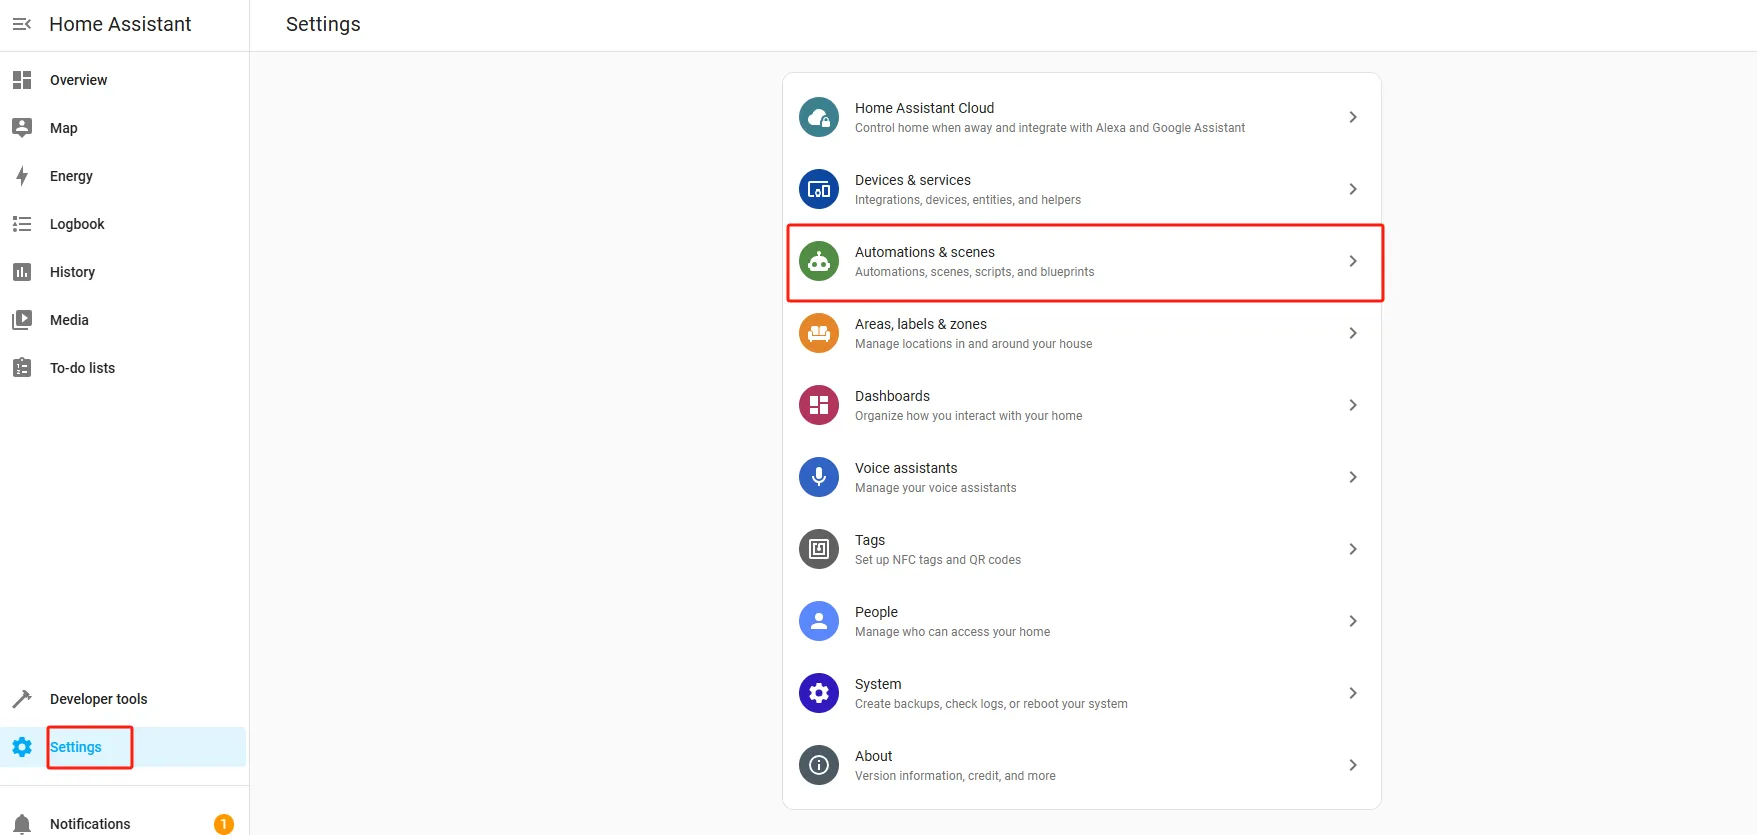
1. On the Home Assistant page, click "Settings" in the left sidebar, then click "Automations & scenes".

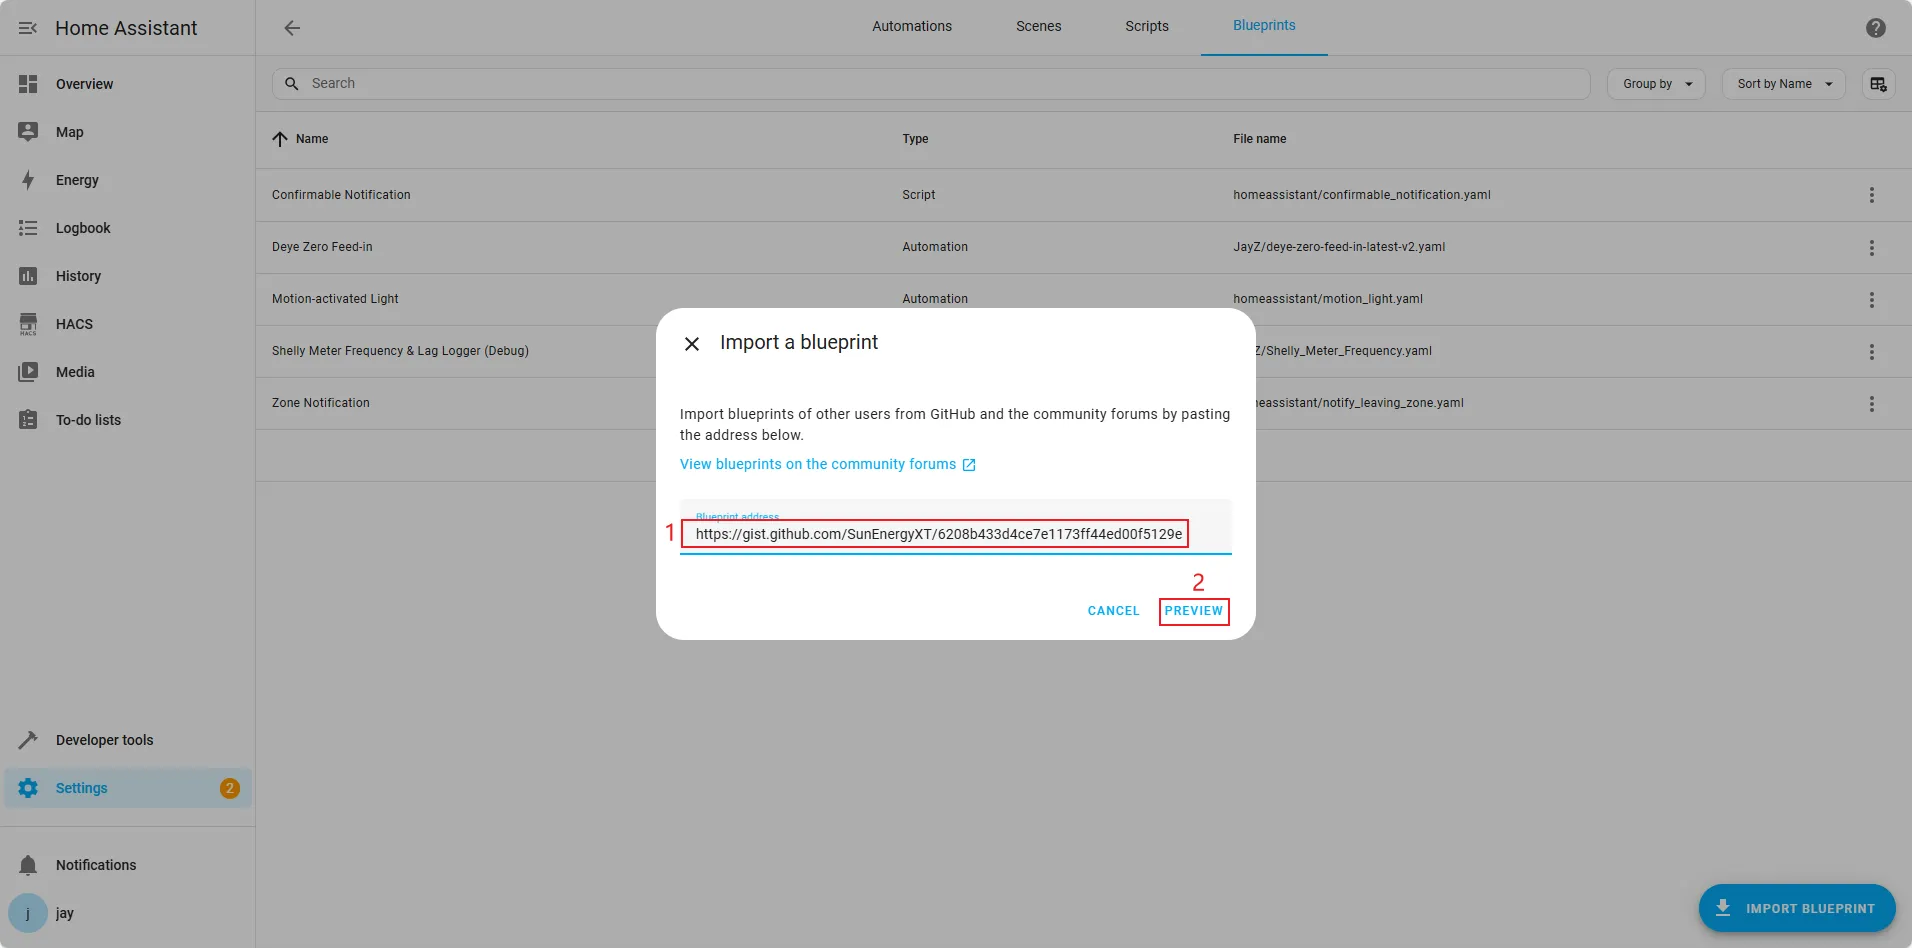
2. Select "Blueprints" in the top navigation bar and click "IMPORT BLUEPRINT".

3. Enter the blueprint address in the pop-up window, then click "PREVIEW".
Blueprint address: https://gist.github.com/SunEnergyXT/e5487ff1669ed17c7a14e00ca2390f75
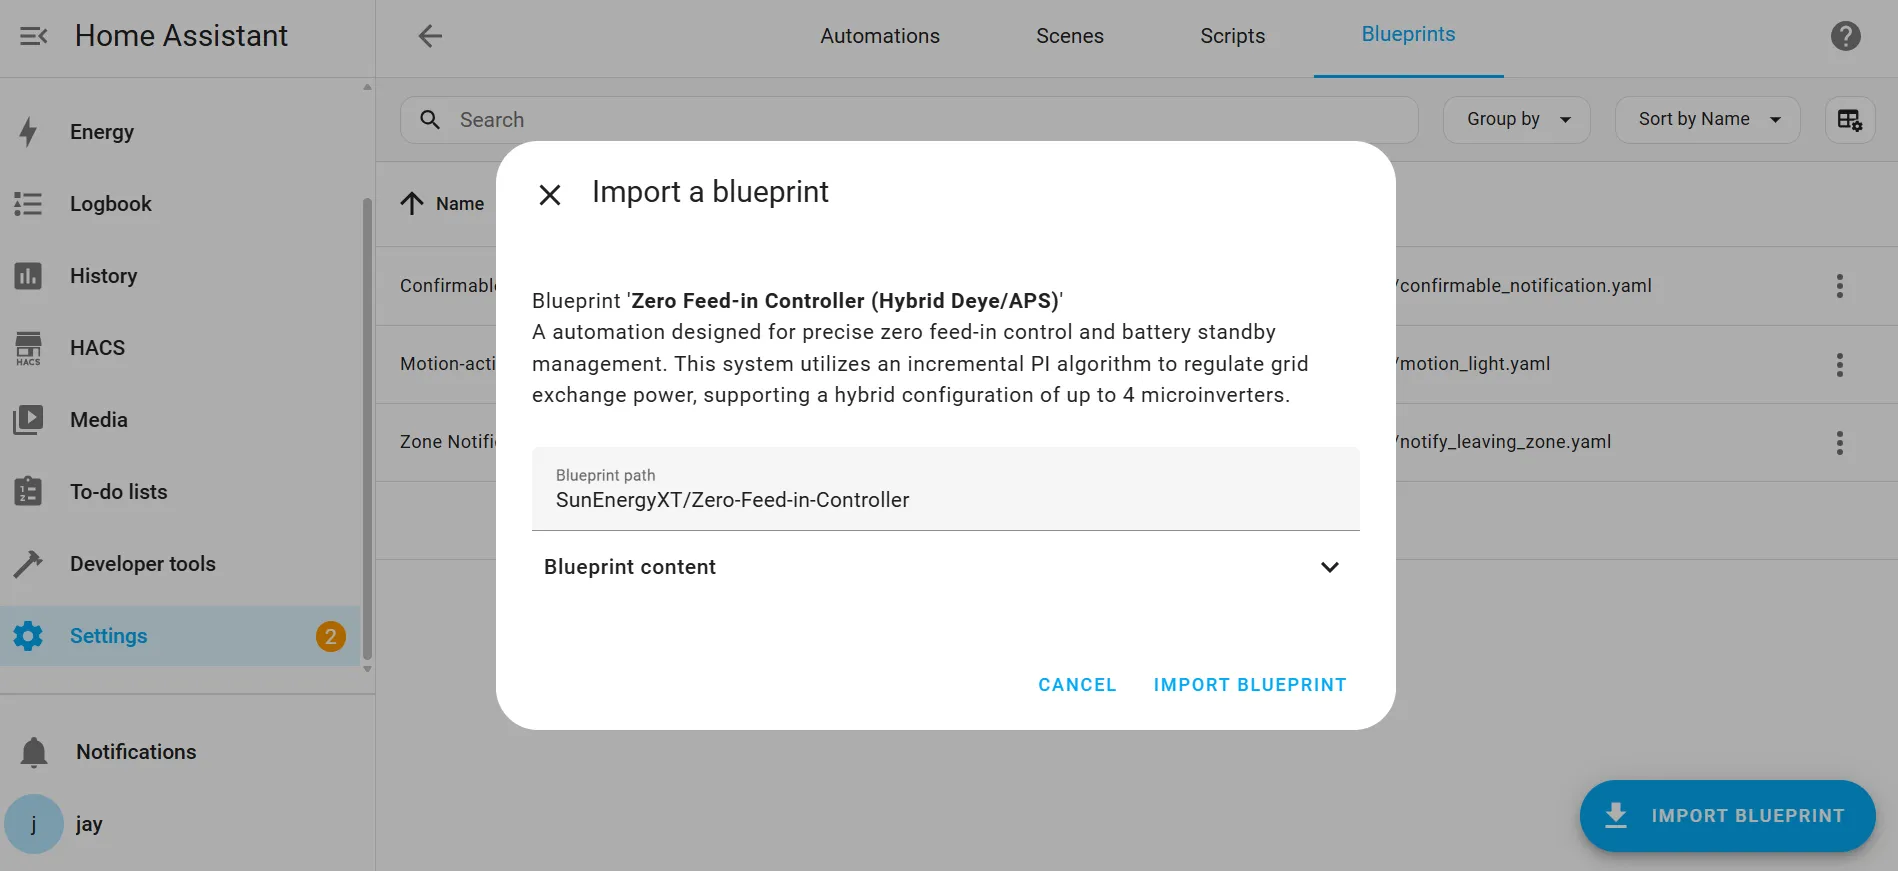
4. Click "IMPORT BLUEPRINT".
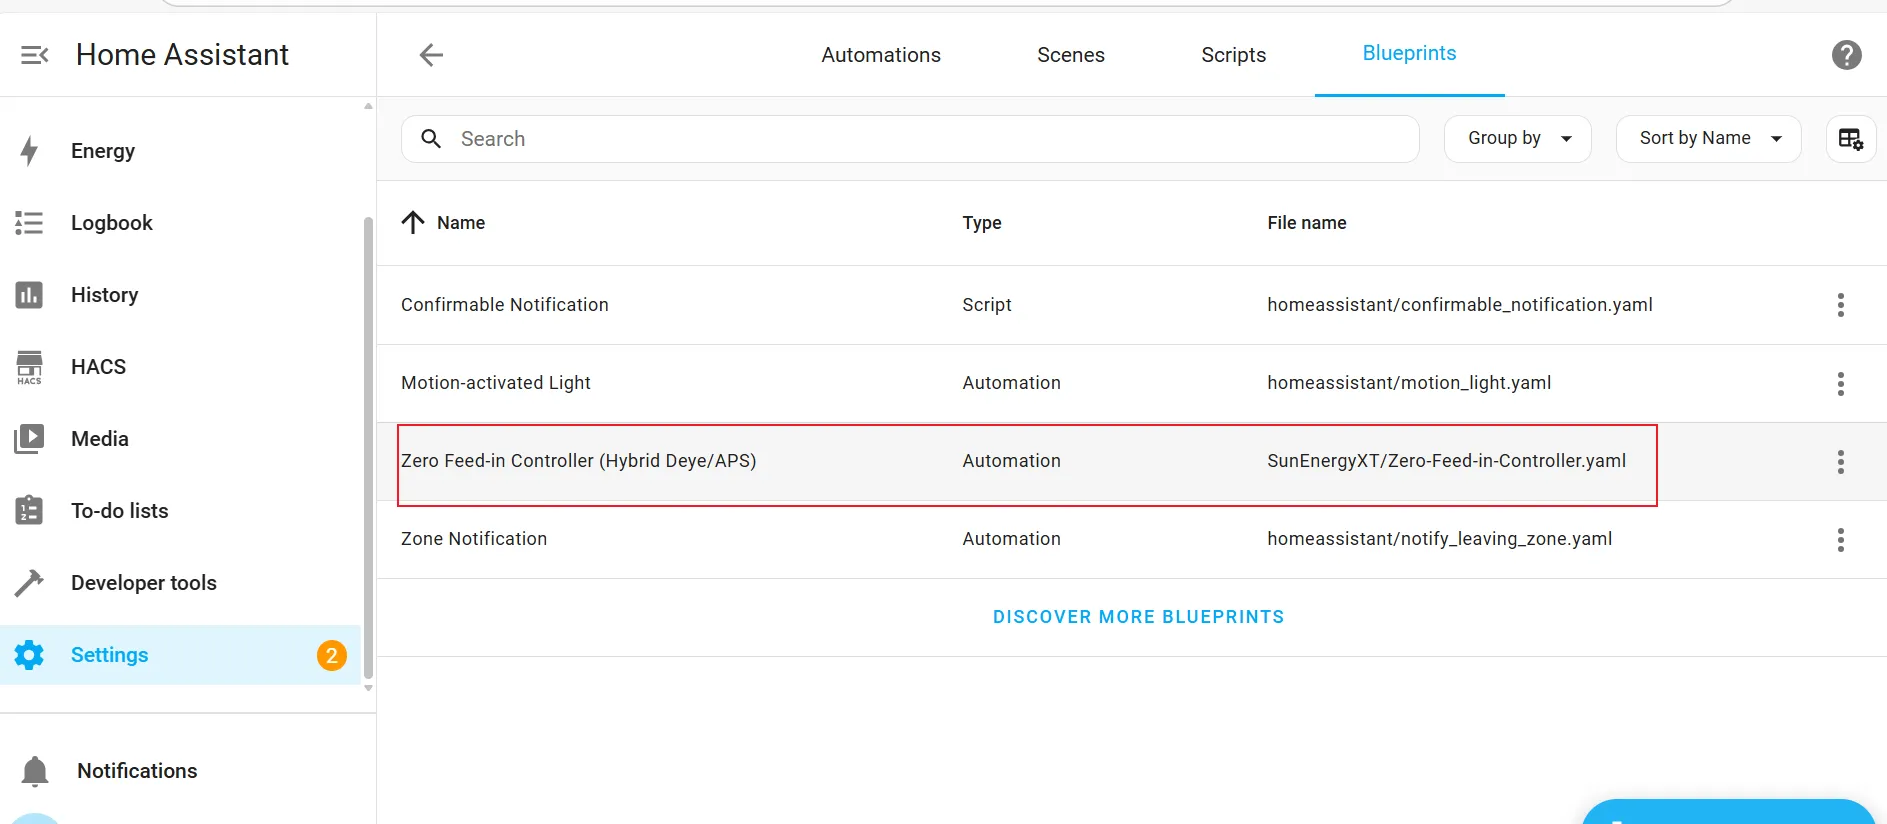
5. Check in the blueprint list whether the zero-feed blueprint has been imported successfully.
Step 2 | Create a Helper Entity
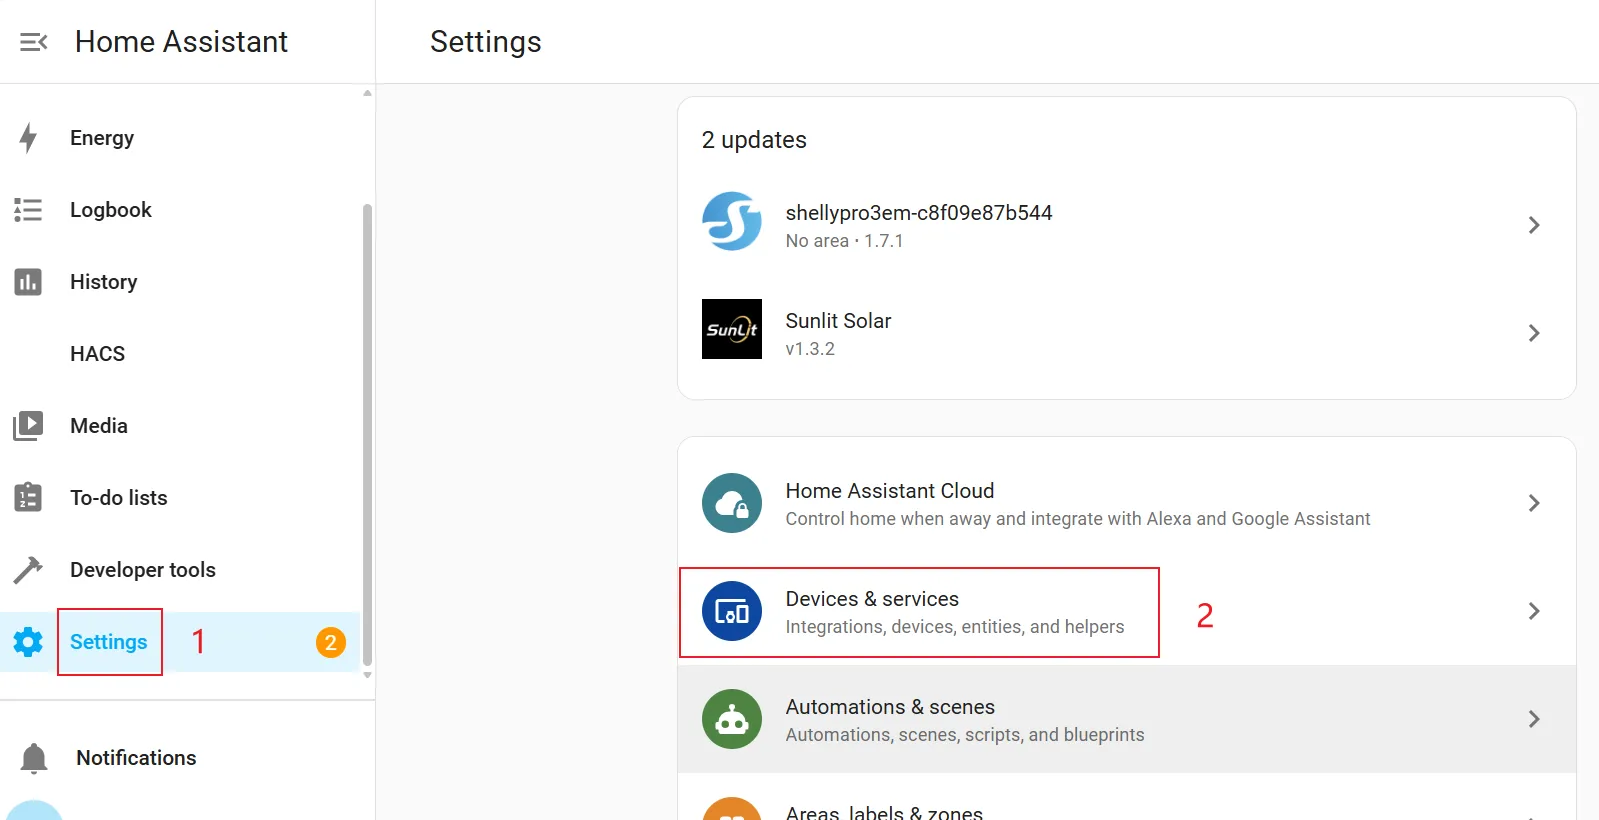
1. On the Home Assistant page, click "Settings" in the left sidebar, then click "Devices & services".
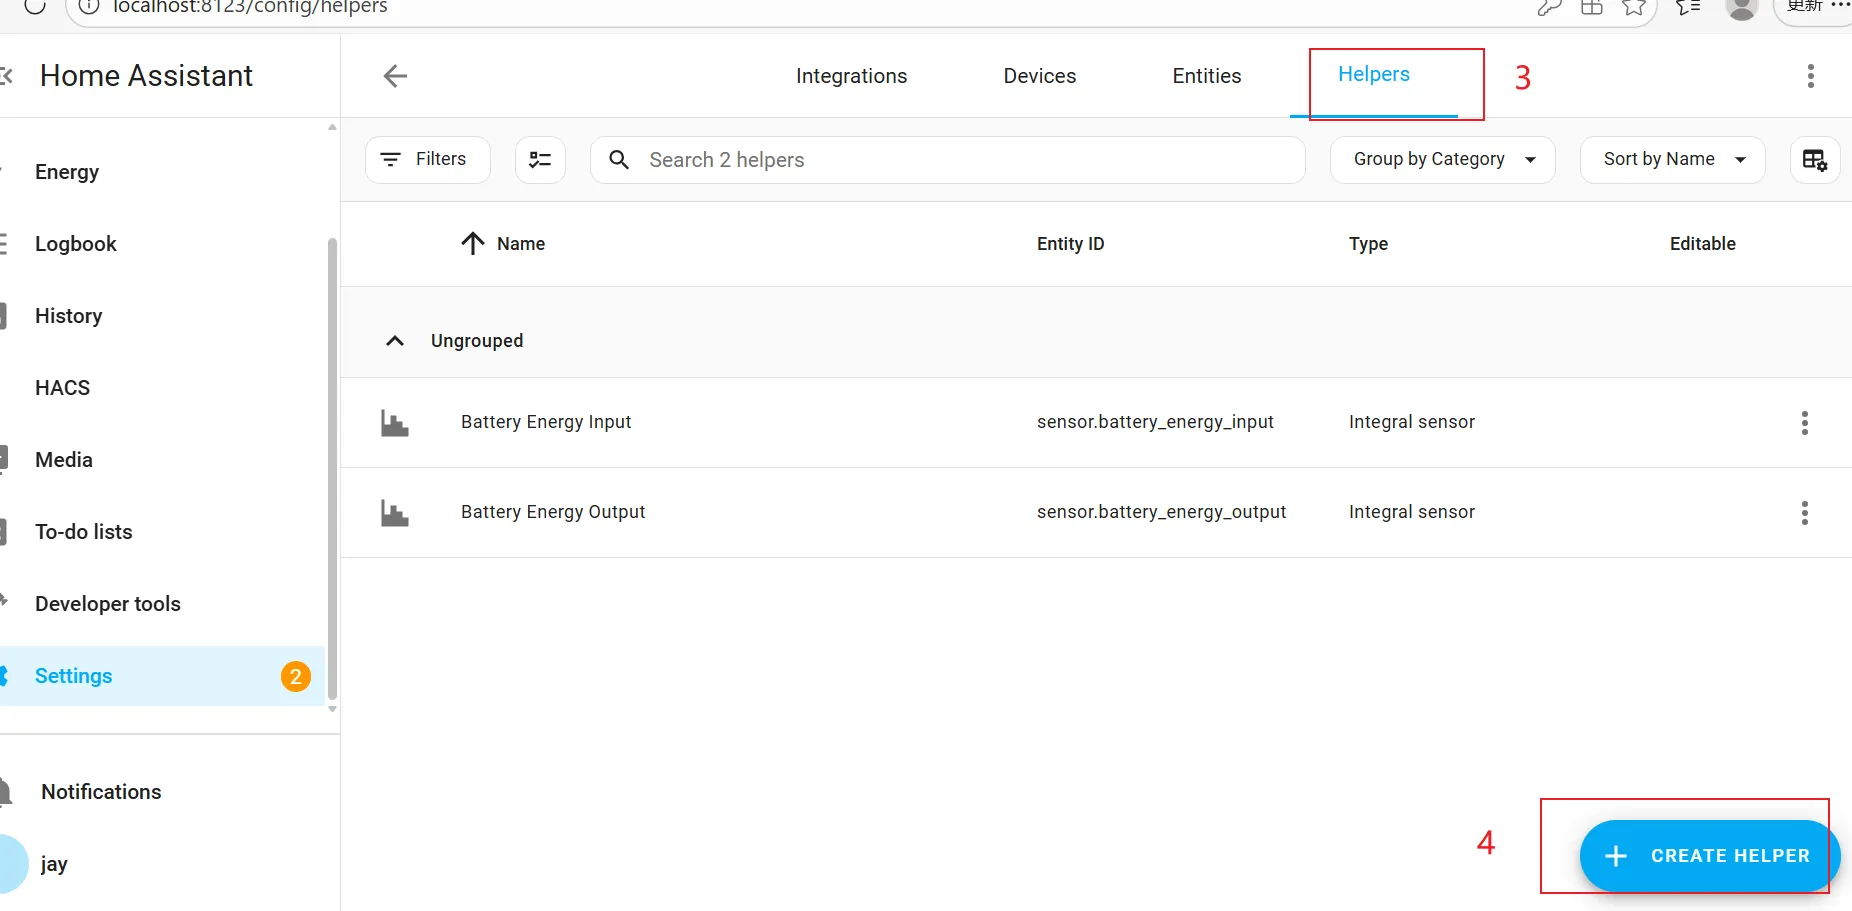
2. Select "Helpers" in the top navigation bar and click "CREATE HELPER".
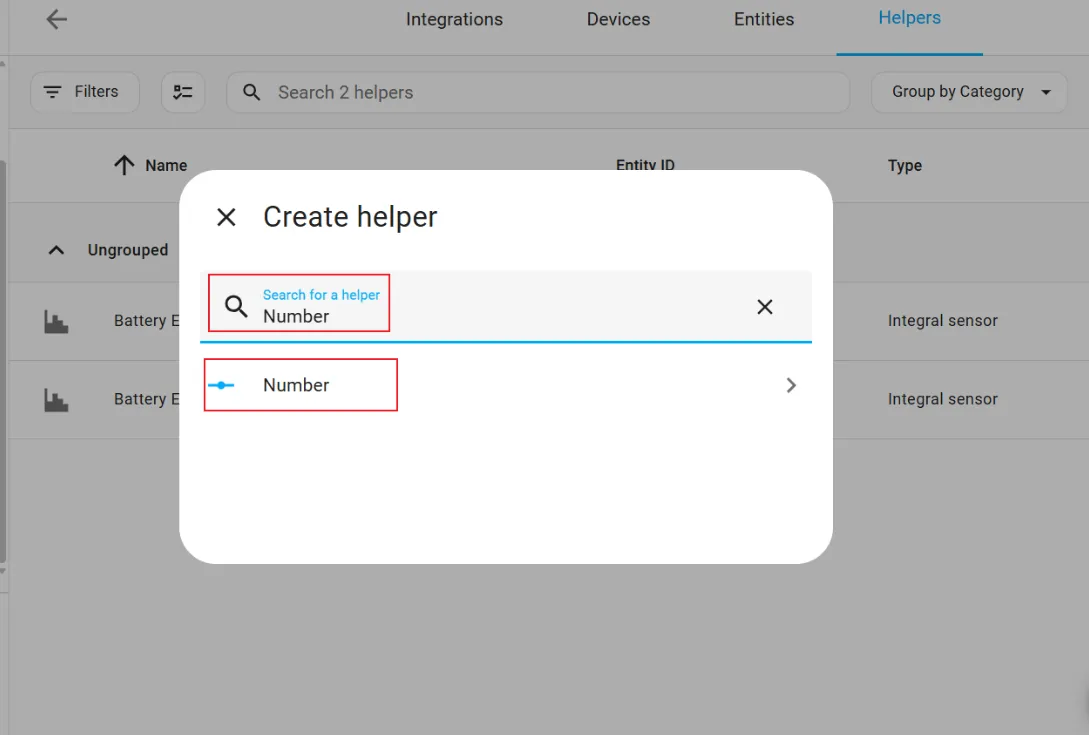
3. Enter "Number" in the search box to search, then select "Number" from the search results.
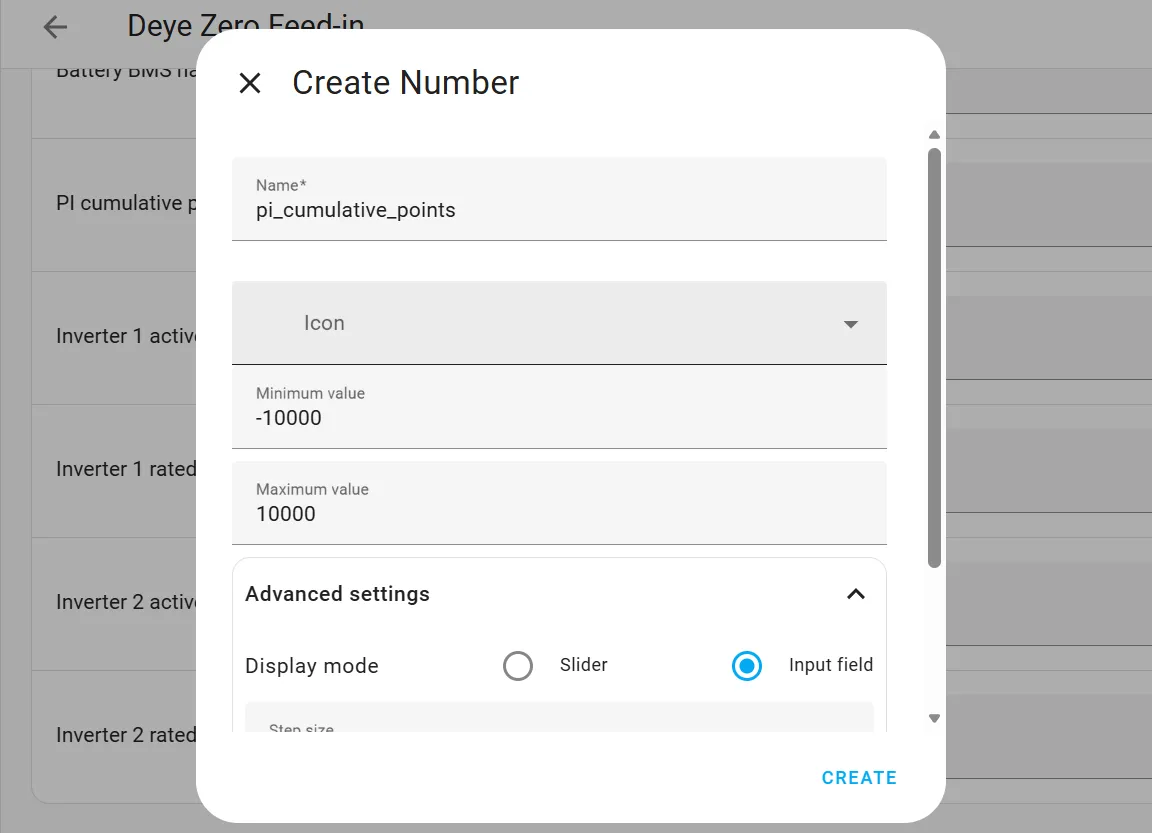
4. Configure helper program parameters. After configuration is complete, click: "CREATE"
- Name: pi_cumulative_points
- Minimum value: -10000
- Maximum value: 10000
- Advanced settings: select "Input field"

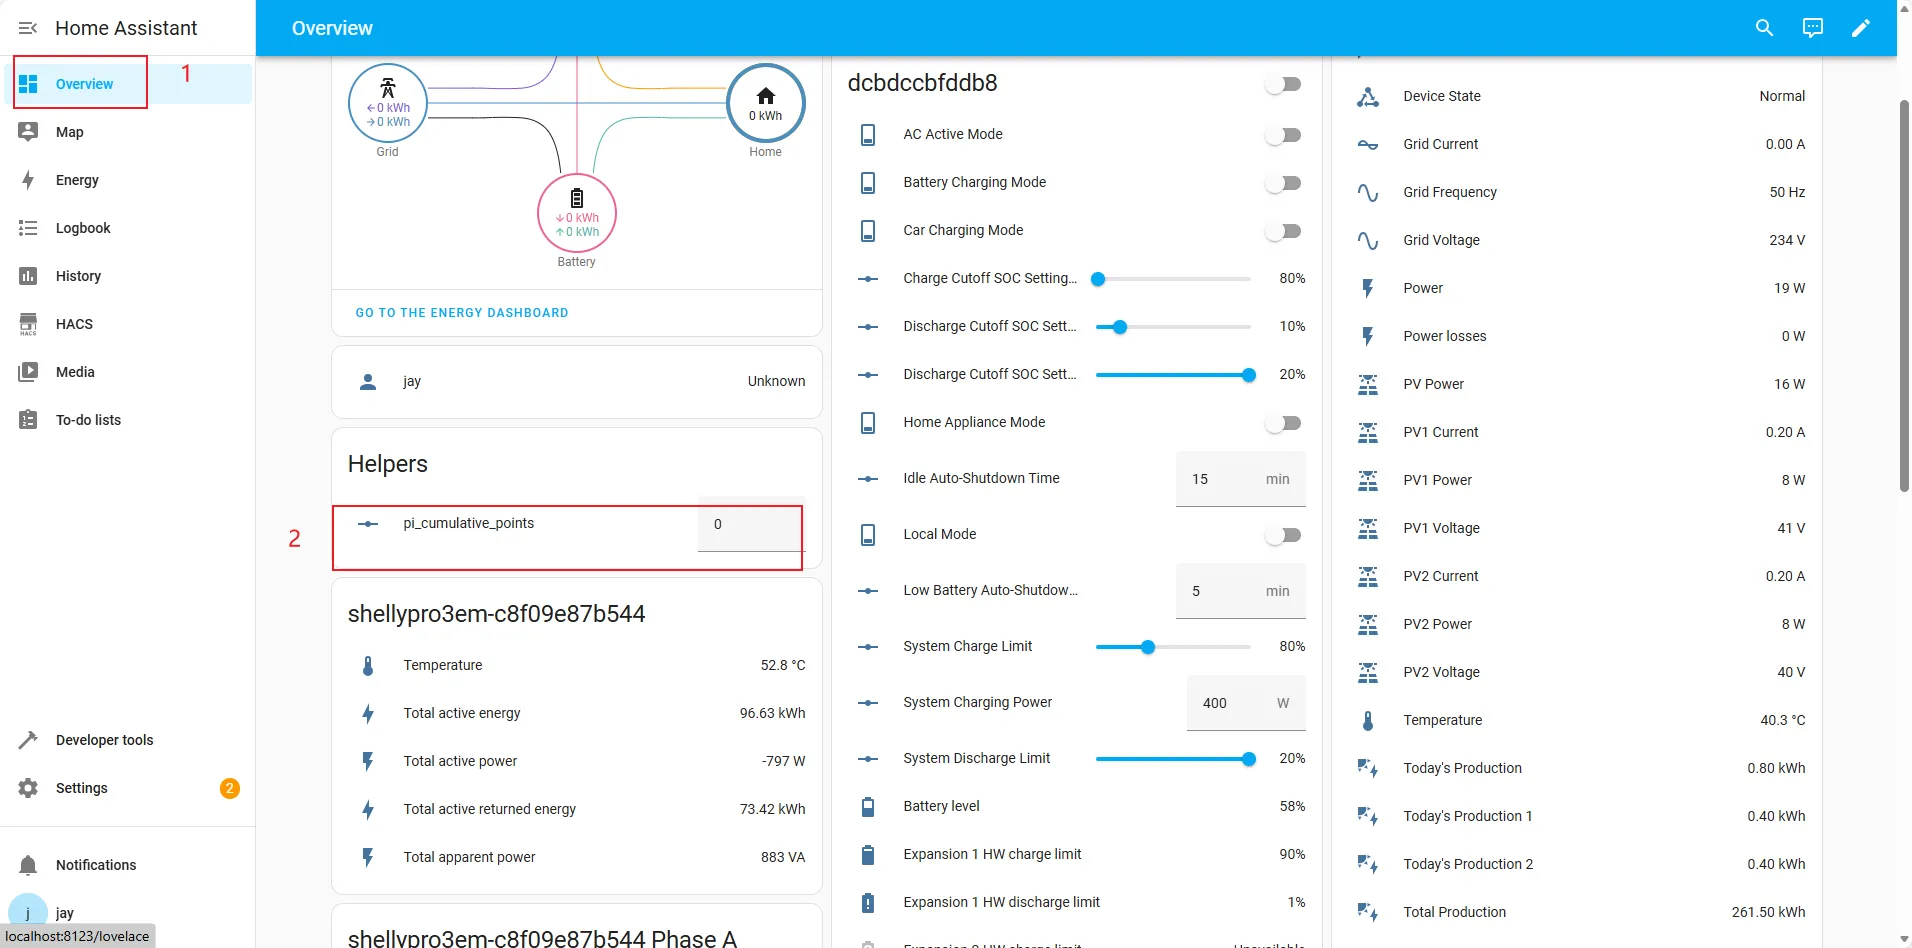
5. After creation, please manually set the initial value of “pi_cumulative_points” to 0.
Step 3 | Create Automation
1. On the Home Assistant page, click "Settings" in the left sidebar, then click "Automations & scenes".

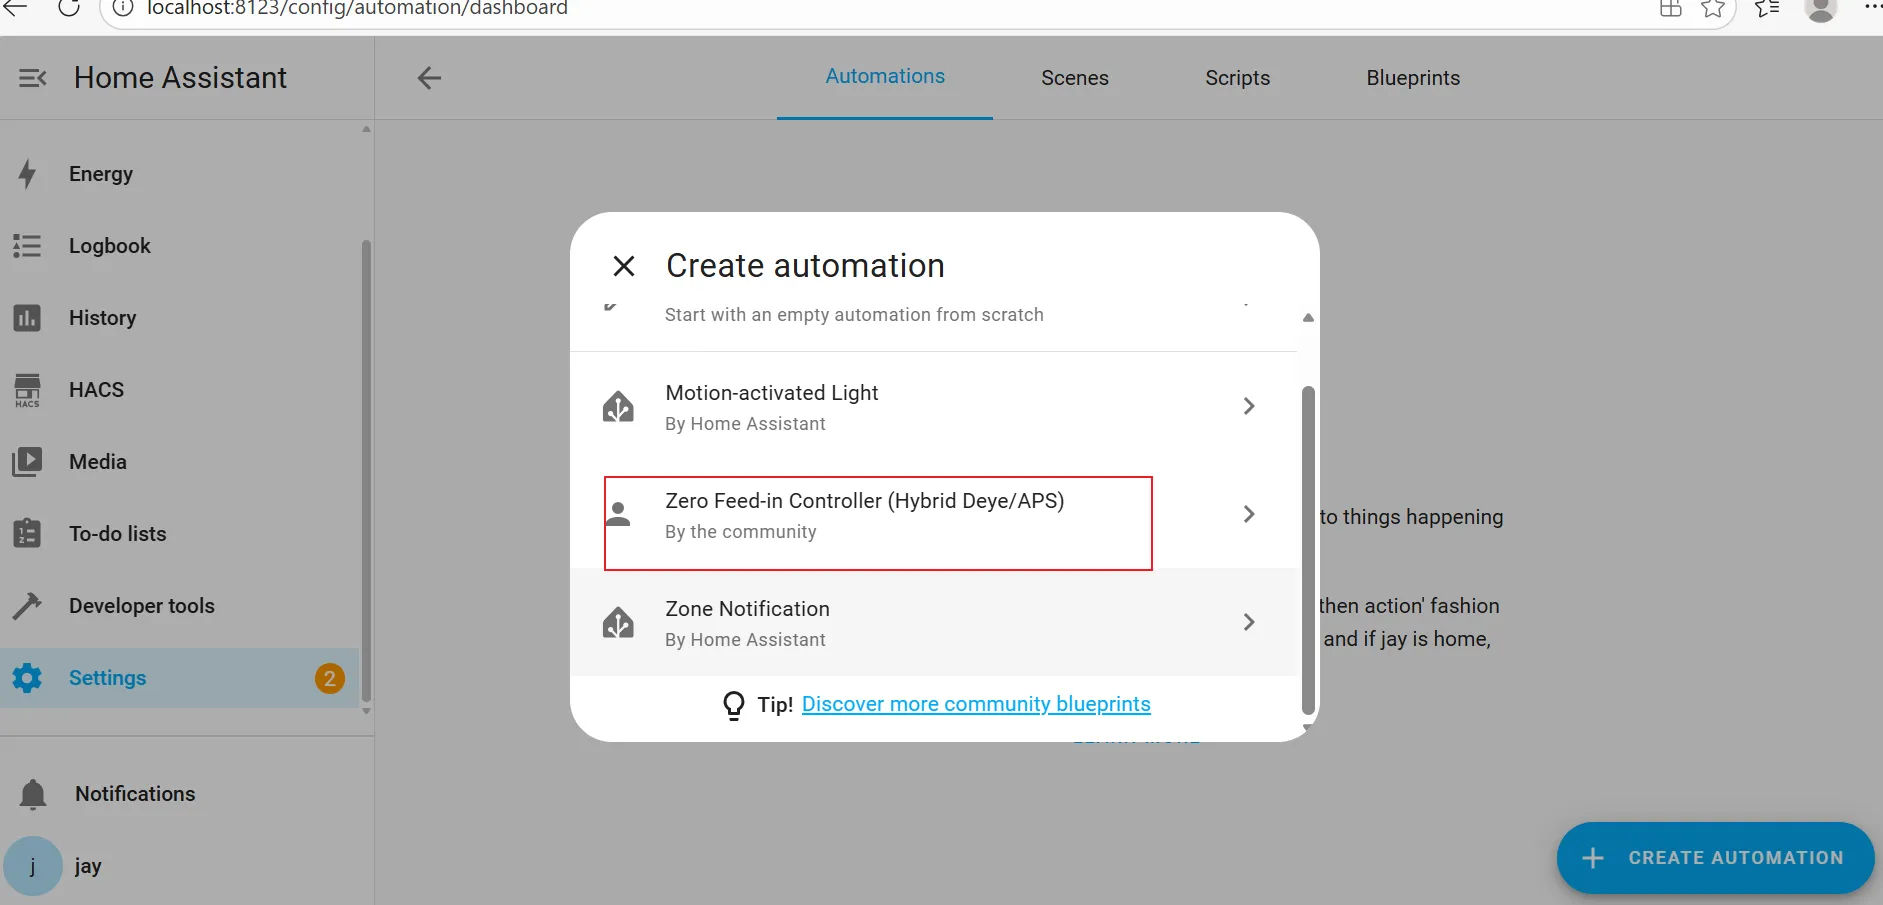
2. Select "Automations" in the top navigation bar and click "CREATE AUTOMATION".

3. Select previously imported blueprints.
Step 4 | Configure Automation Parameters
Shelly and Battery Parameters
Shelly total active power sensor (Required).
Enter "Total active power" in the search box to search, then select the "Total active power" for the corresponding device from the search results.
![]()
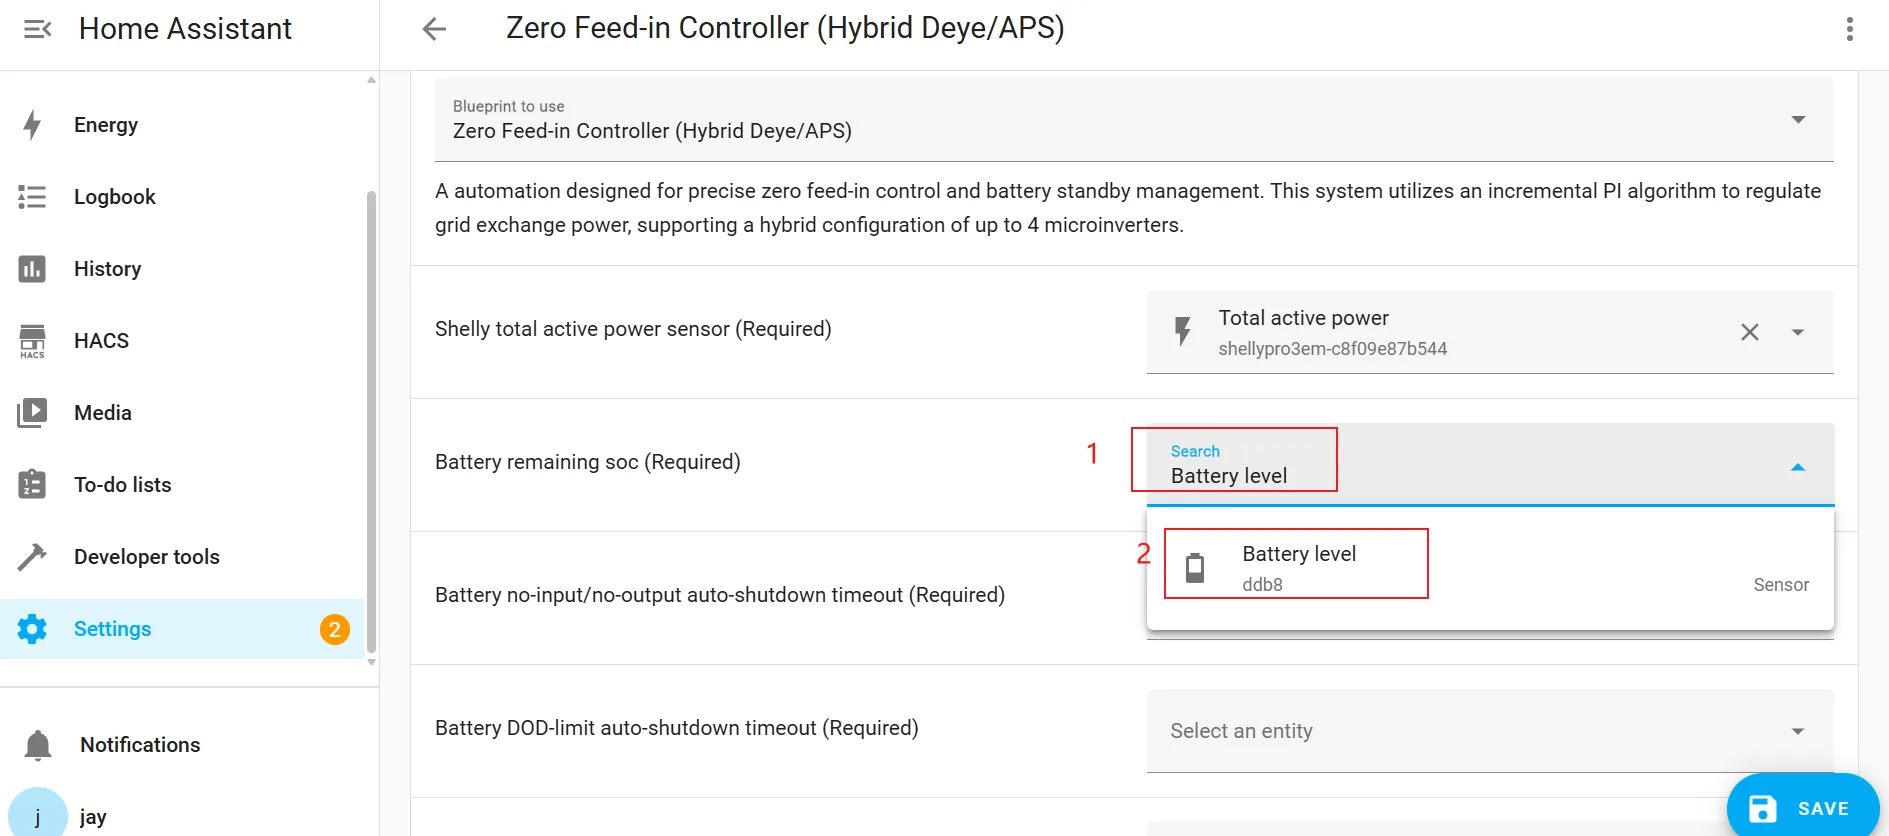
Battery remaining SOC (Required).
Enter "Battery level" in the search box to search, then select the "Battery level" for the corresponding device from the search results.
![]()
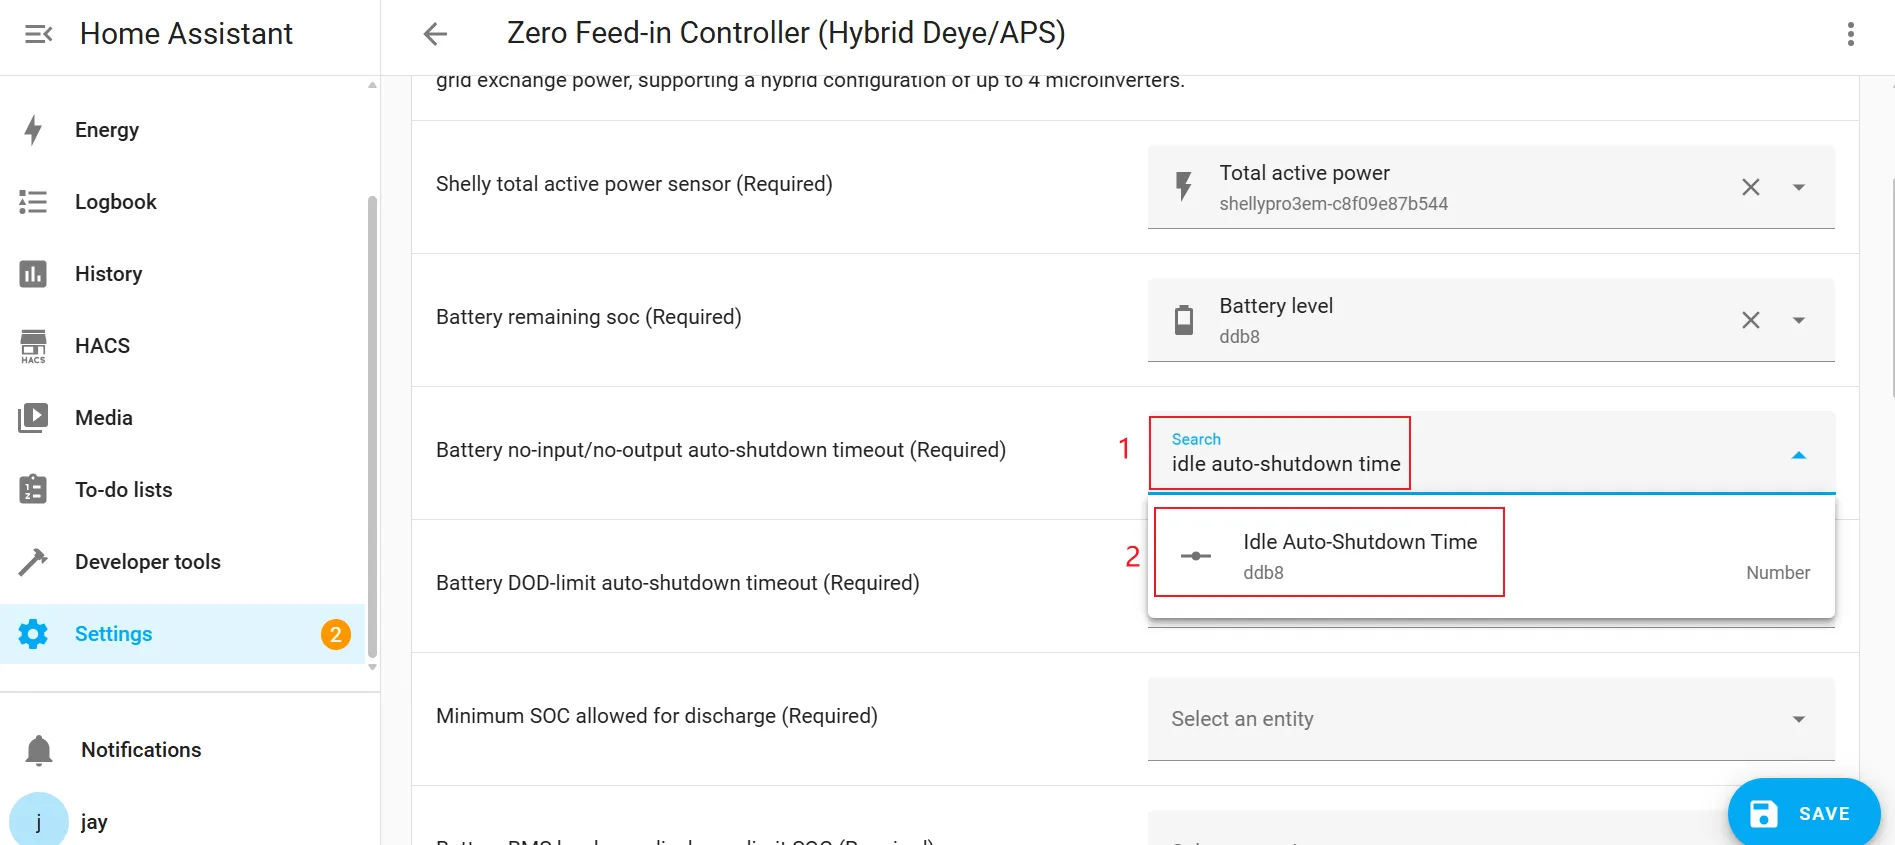
Battery no-input/no-output auto-shutdown timeout (Required).
Enter "idle auto-shutdown time" in the search box to search, then select the "idle auto-shutdown time" for the corresponding device from the search results.
![]()
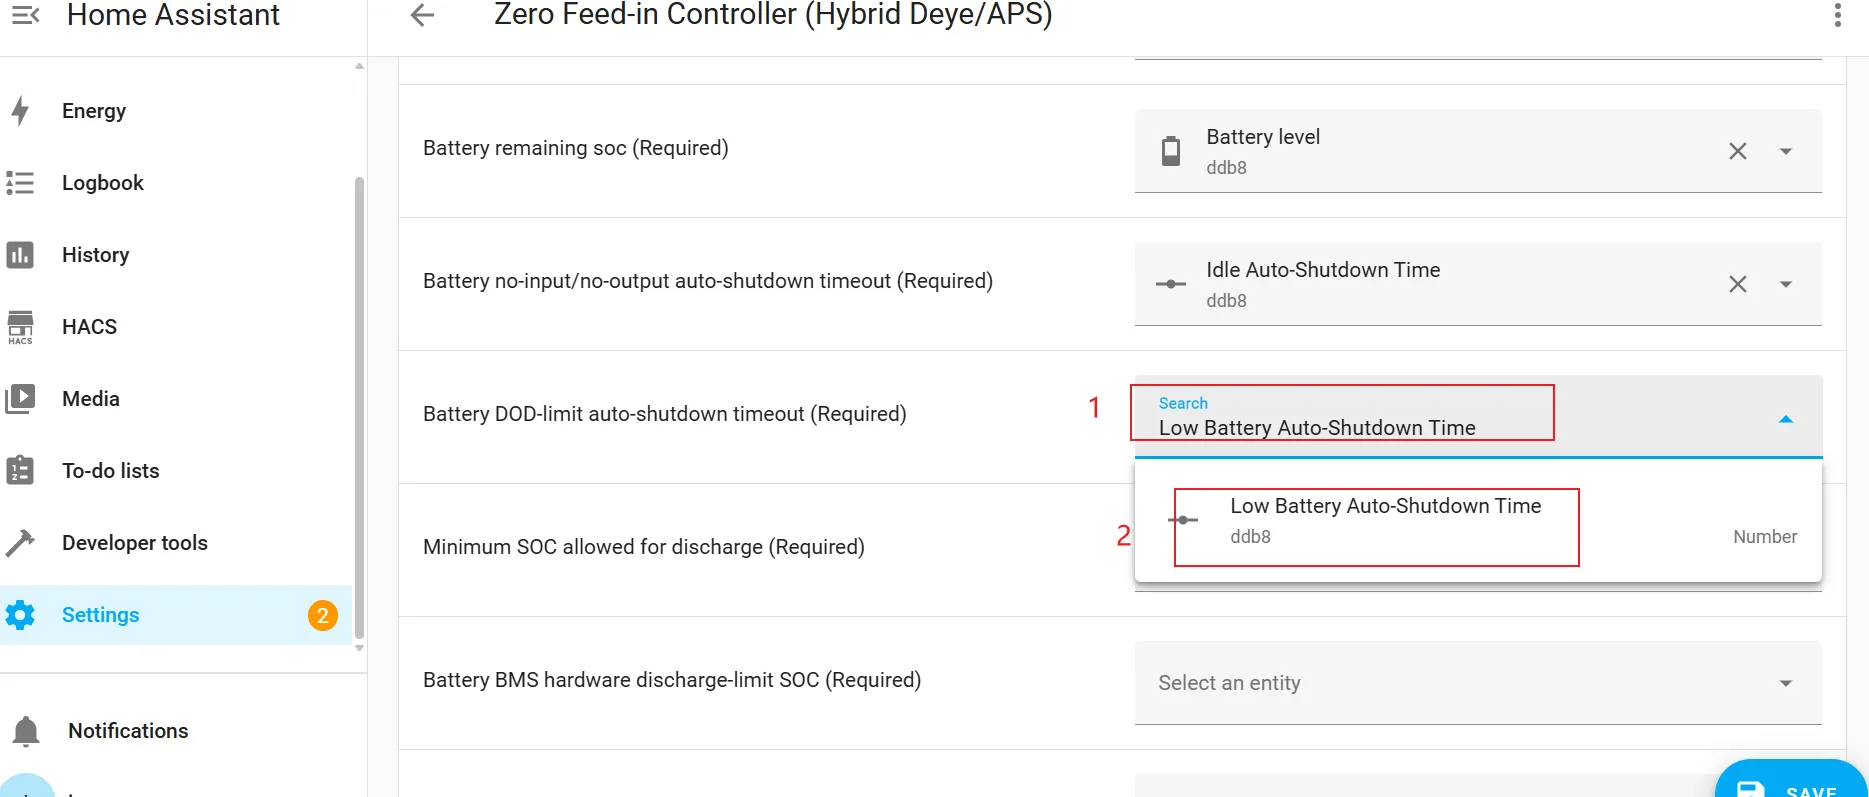
Battery DOD-limit auto shutdown timeout (Required).
Enter "Low Battery Auto-Shutdown Time" in the search box to search, then select the "Low Battery Auto-Shutdown Time" for the corresponding device from the search results.
![]()
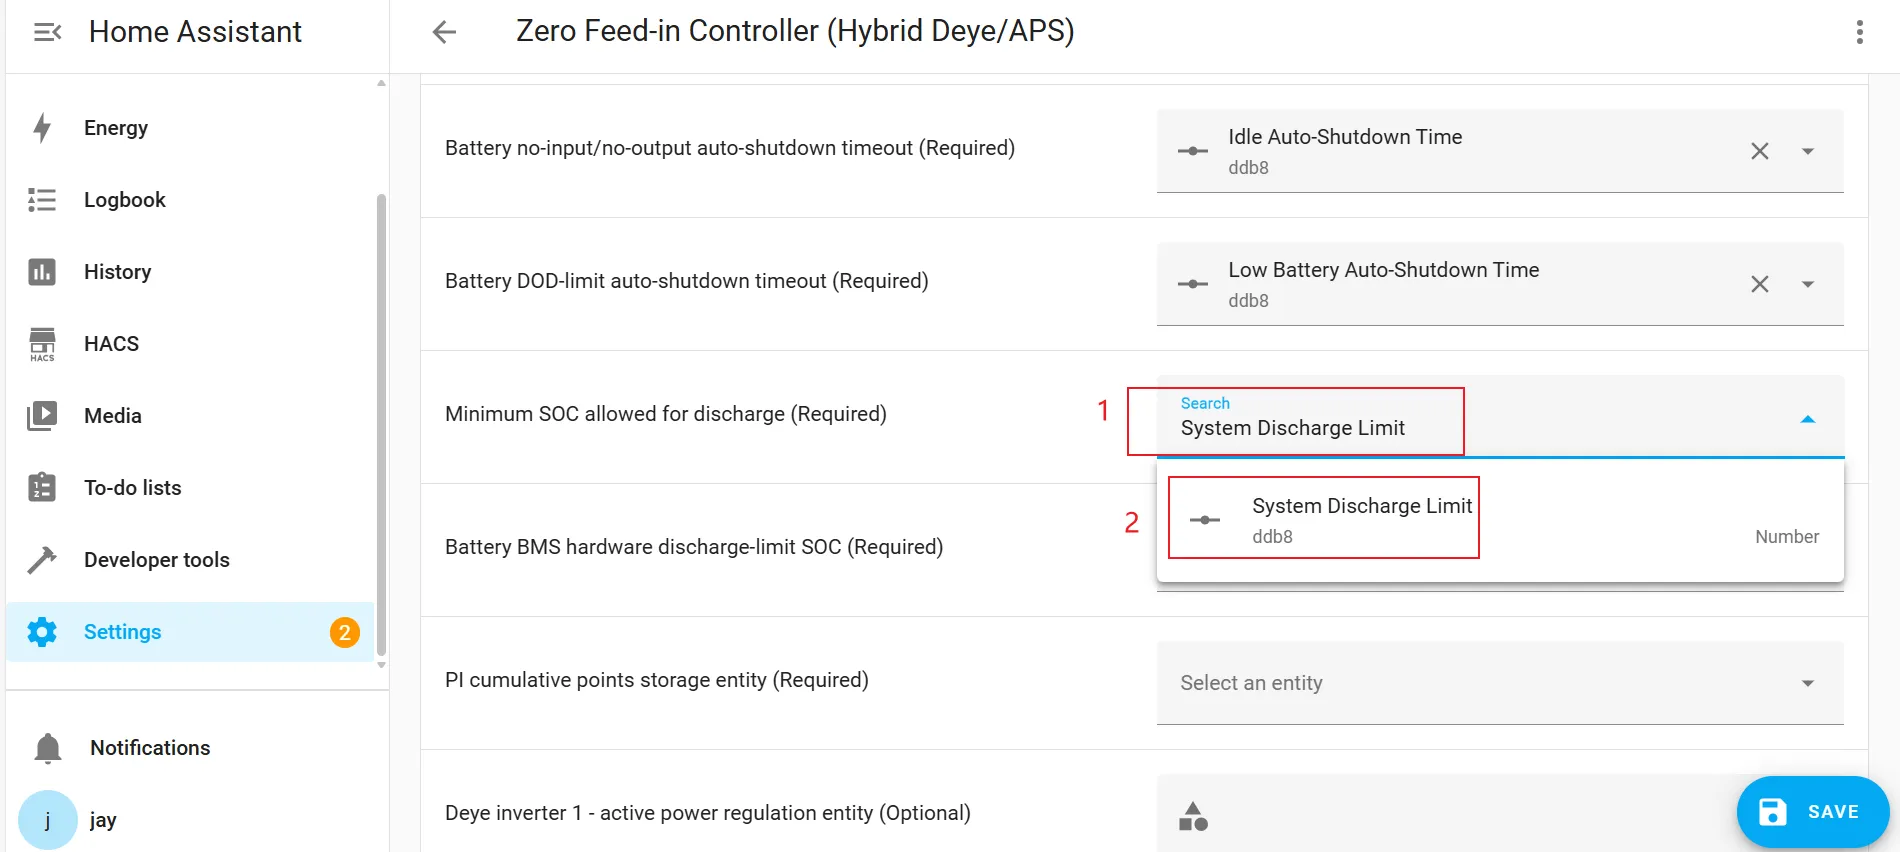
Minimum SOC allowed for discharge (Required).
Enter "System Discharge Limit" in the search box to search, then select the "System Discharge Limit" for the corresponding device from the search results.
![]()
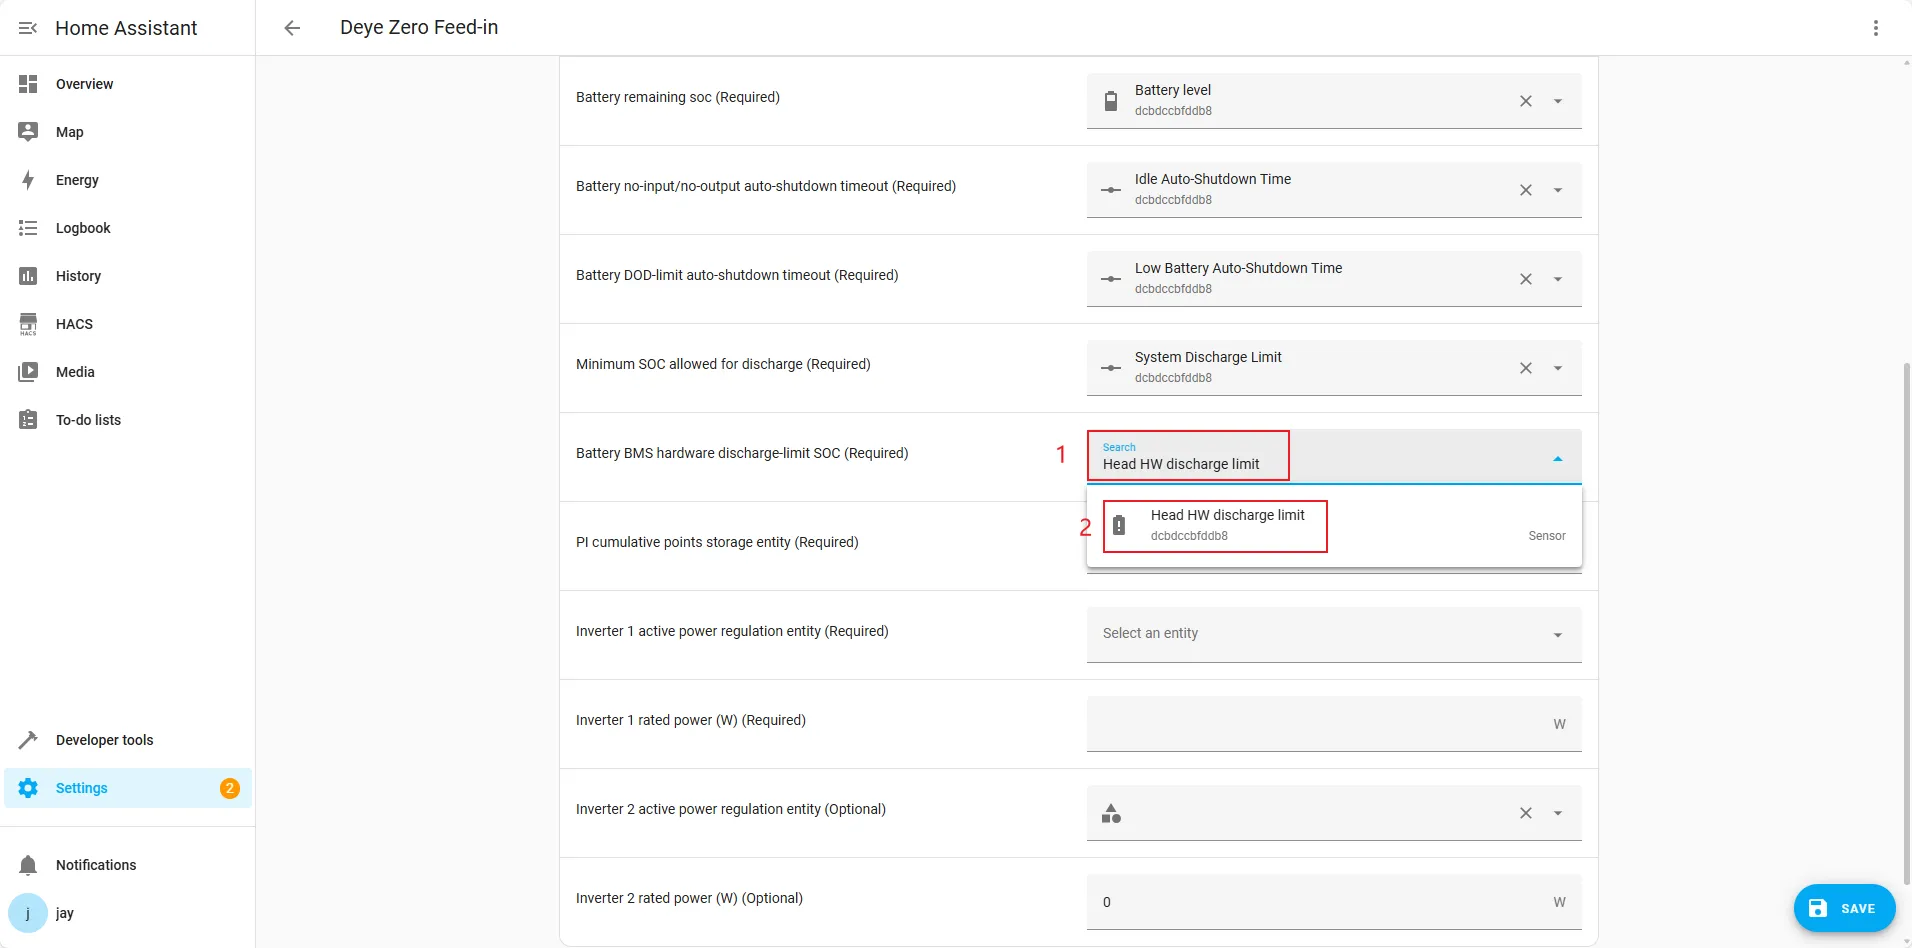
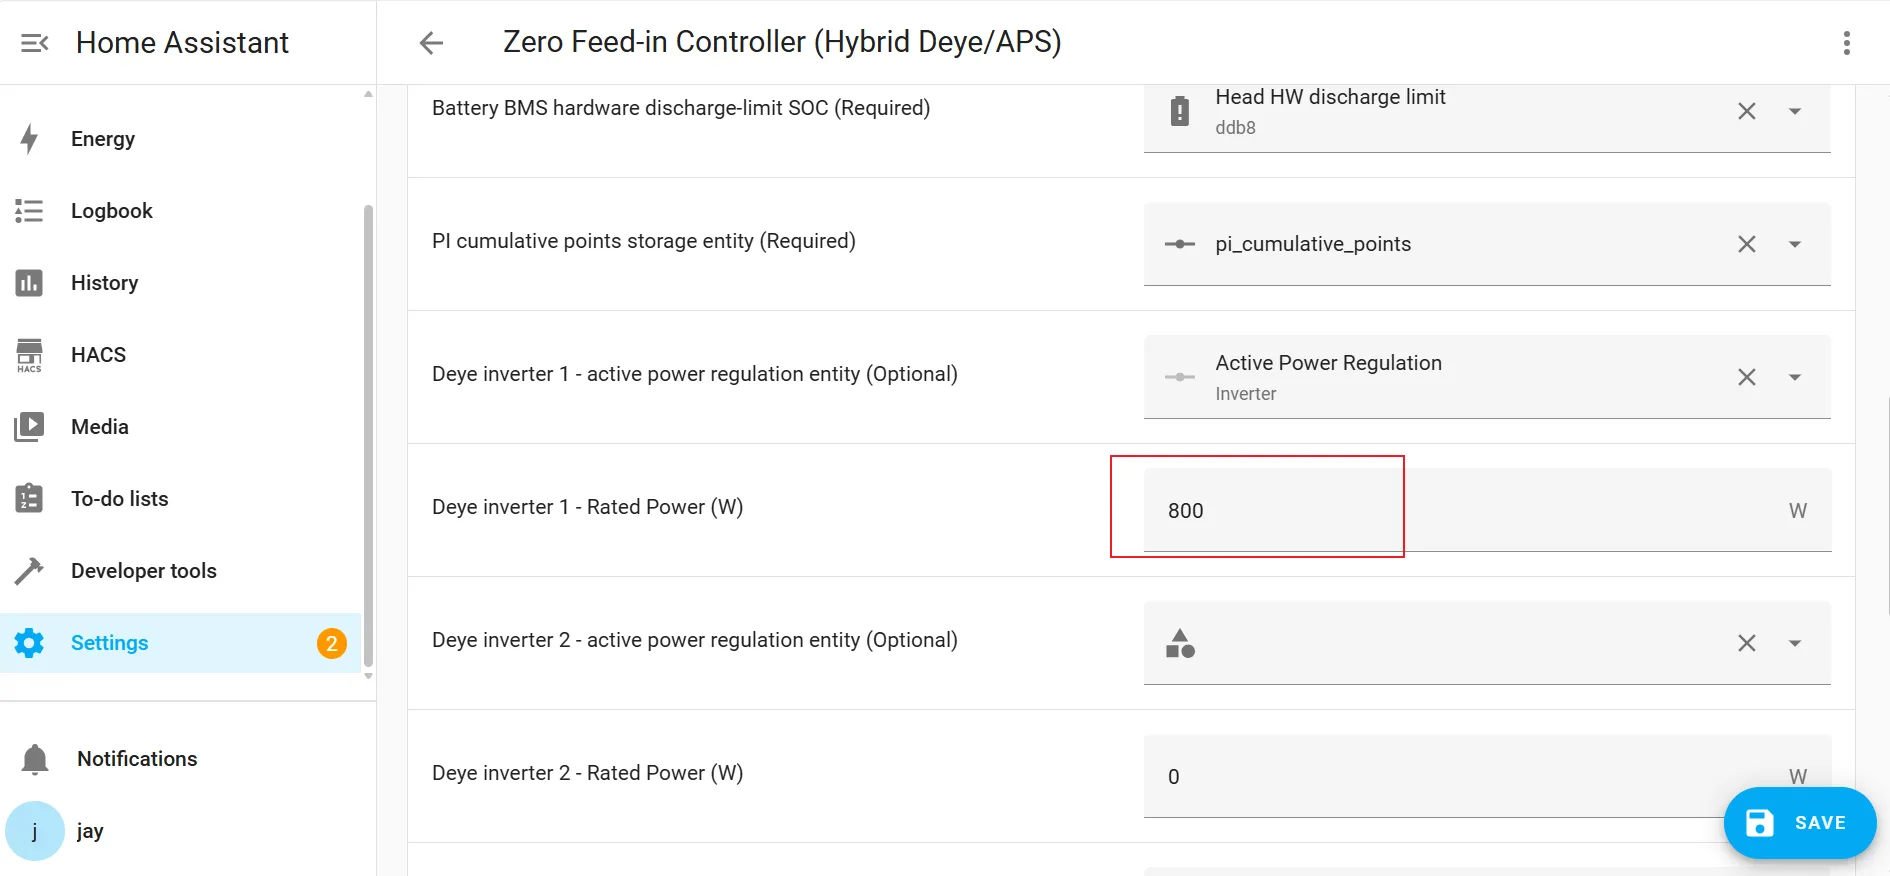
Battery BMS hardware discharge-limit SOC (Required).
Enter "Head HW discharge limit" in the search box to search, then select the "Head HW discharge limit" for the corresponding device from the search results.
![]()

PI Control Parameters
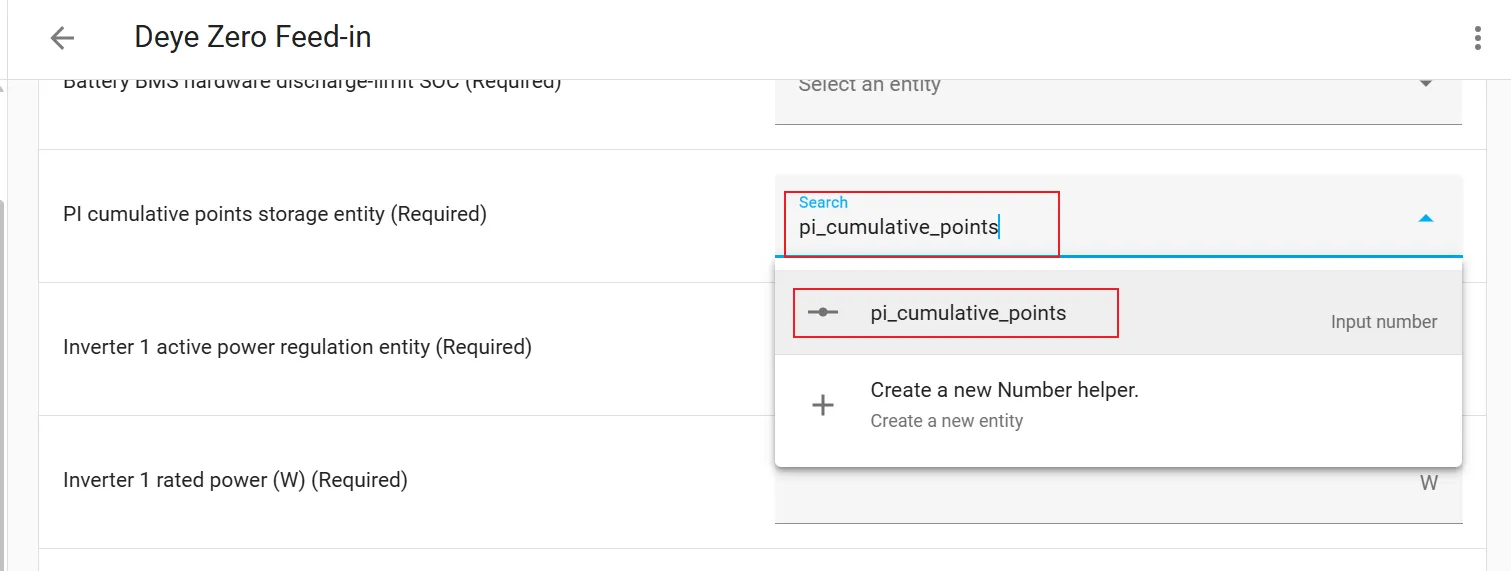
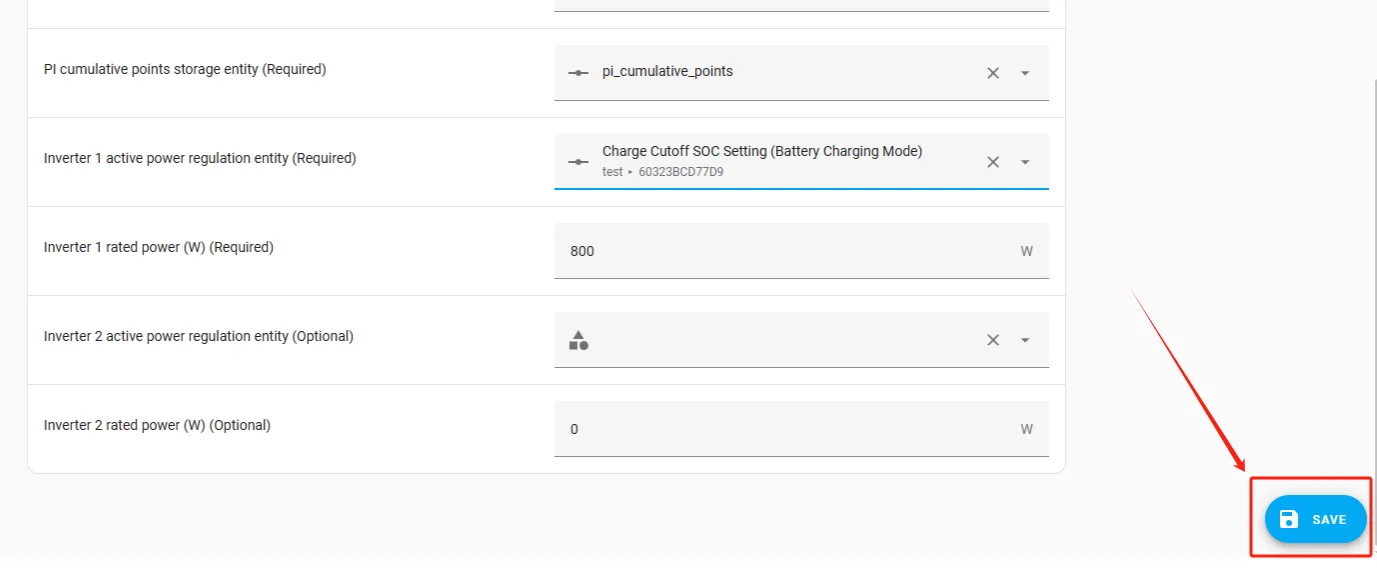
PI cumulative points storage entity (Required).
Enter "pi_cumulative_points" in the search box to search, then select the "pi_cumulative_points" for the corresponding device from the search results.
![]()
Inverter Parameters
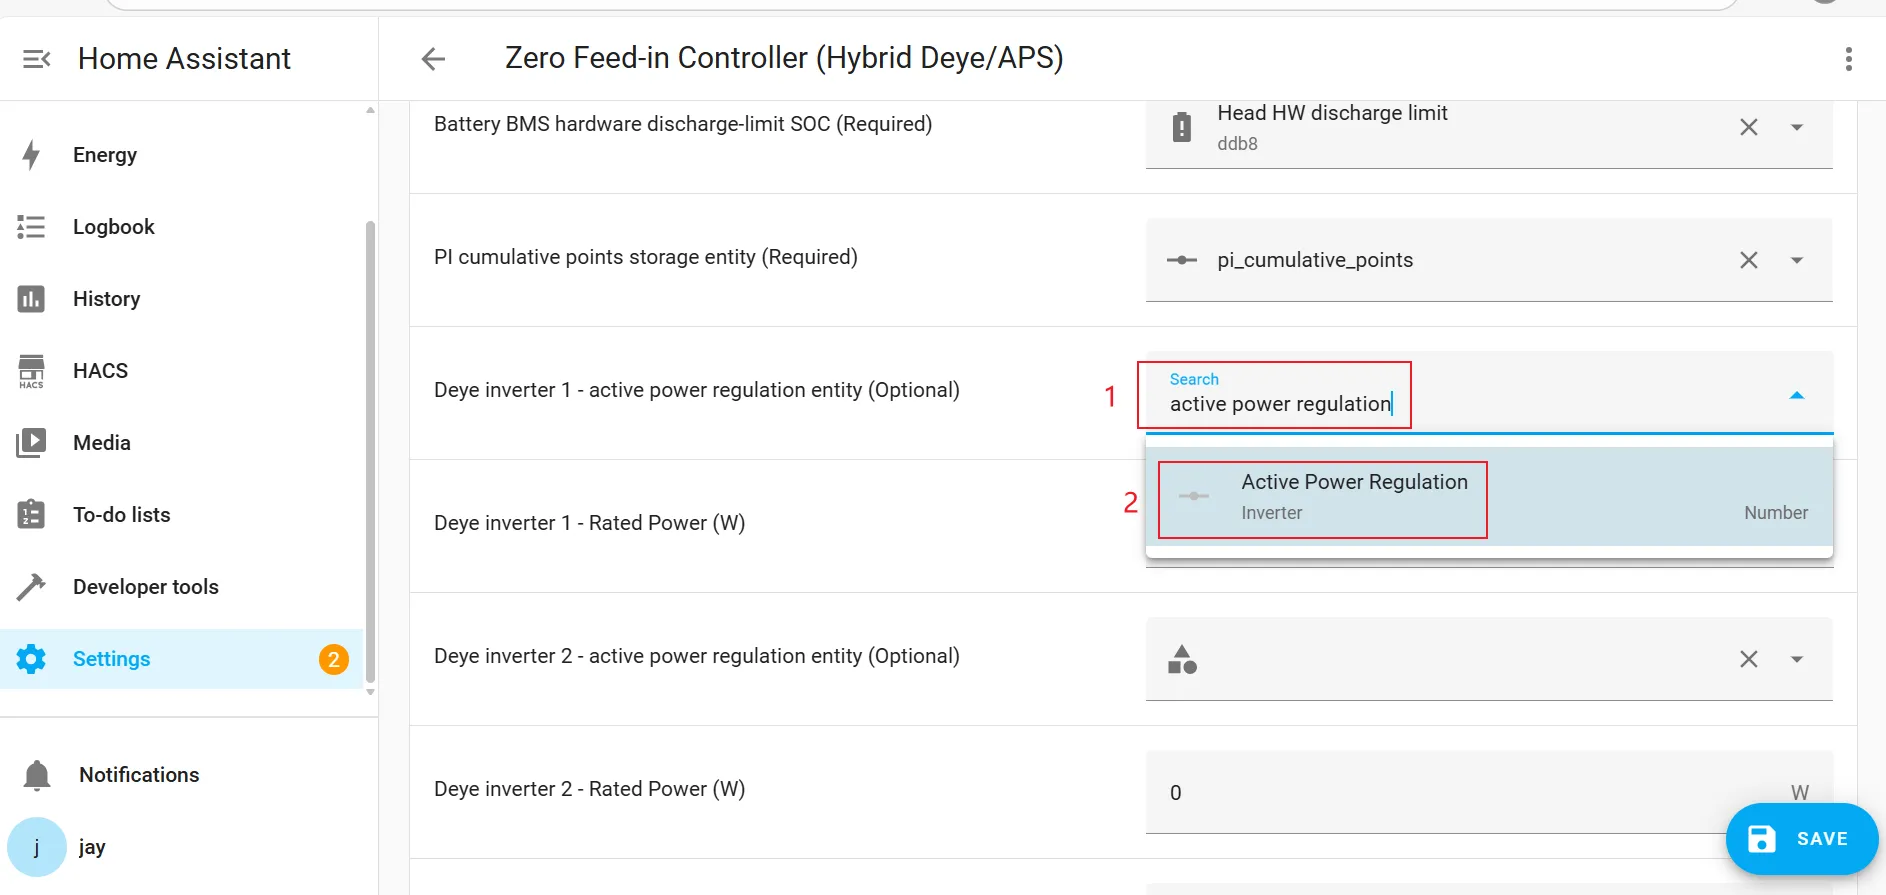
Deye inverter 1 - active power regulation entity (Optional).
Enter "active power regulation" in the search box to search, then select the "Active Power Regulation" for the corresponding device from the search results.
![]()
Deye inverter 1 - Rated Power (W).
Enter the actual rated power of your Deye inverter. Please ensure this value is accurate.
![]()
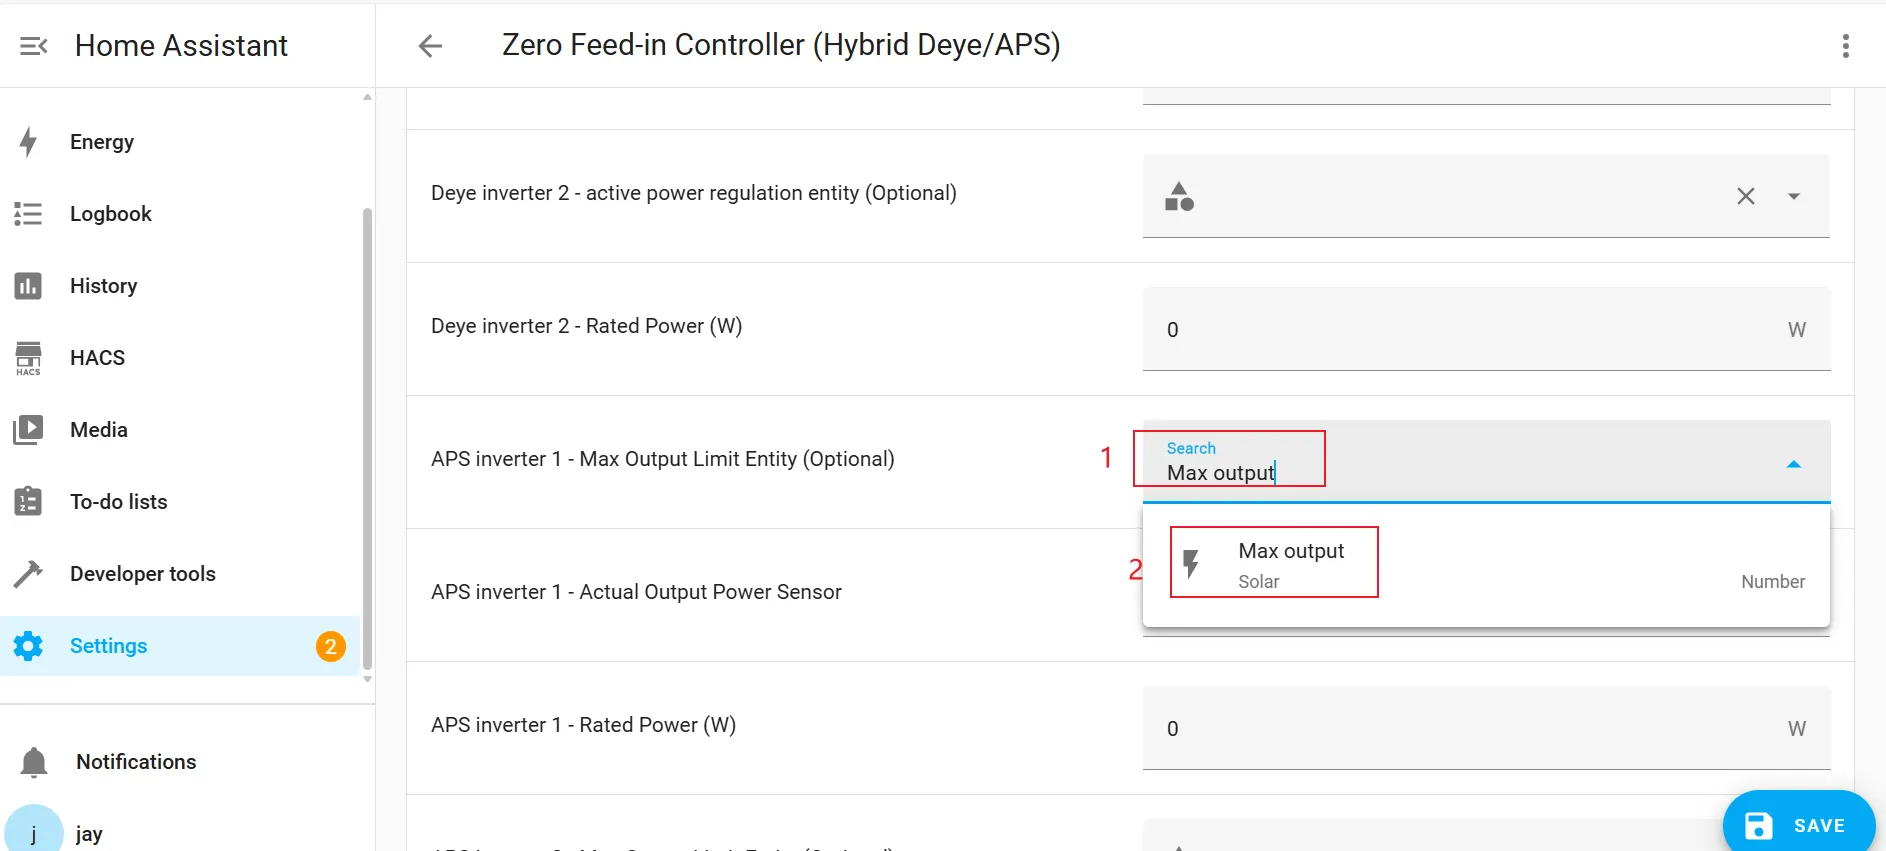
APS inverter 1 - Max Output Limit Entity (Optional).
Enter "Max output" in the search box to search, then select the "Max output" for the corresponding device from the search results.
![]()
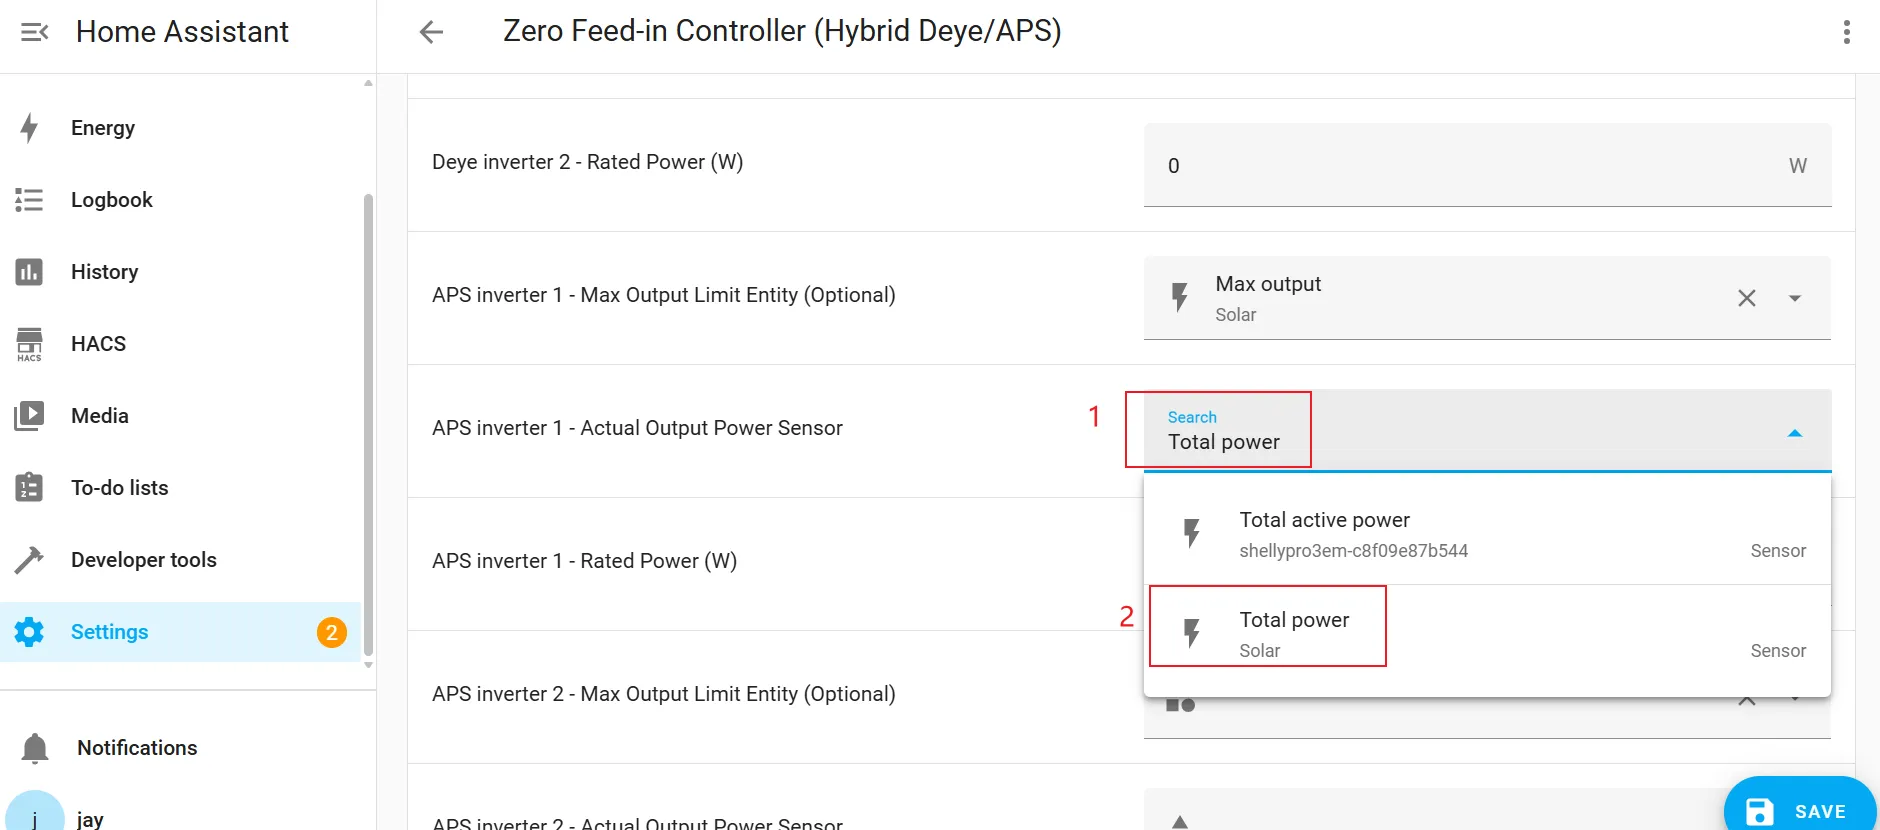
APS inverter 1 - Actual Output Power Sensor.
Enter "Total power" in the search box to search, then select the "Total power" for the corresponding device from the search results.
![]()
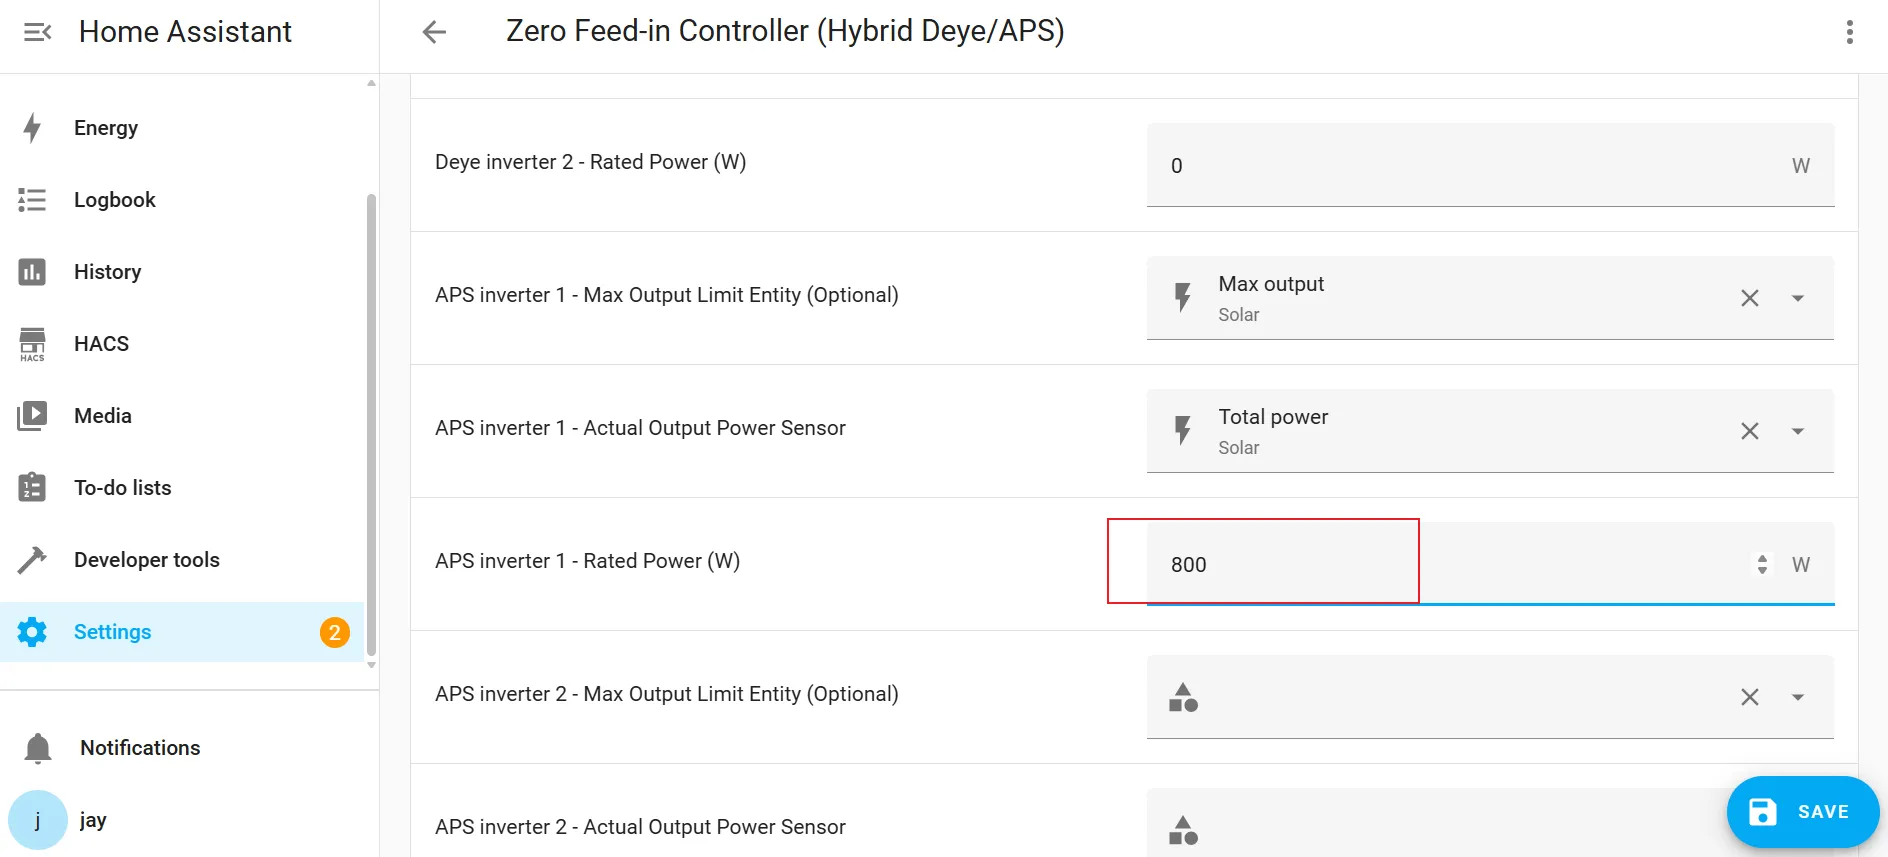
APS inverter 1 - Rated Power (W).
Enter the actual rated power of your APS inverter. Please ensure this value is accurate.
![]()
If multiple inverters are used, make sure to select the correct entity for each device.
Step 5 | Save and Enable the Automation
1. Click the "Save" button in the bottom-right corner.
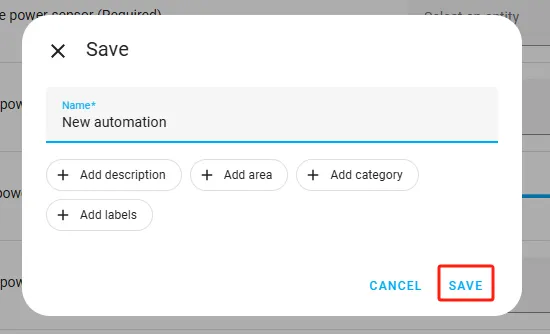
2. Enter the name of the automation in the pop-up window (the name can be customized), then click "Save".
3. Return to the "Automations" page and confirm that the automation is enabled. (Automation typically activates automatically upon completion and does not require manual activation. If it does not appear to have activated automatically, please enable it manually.)
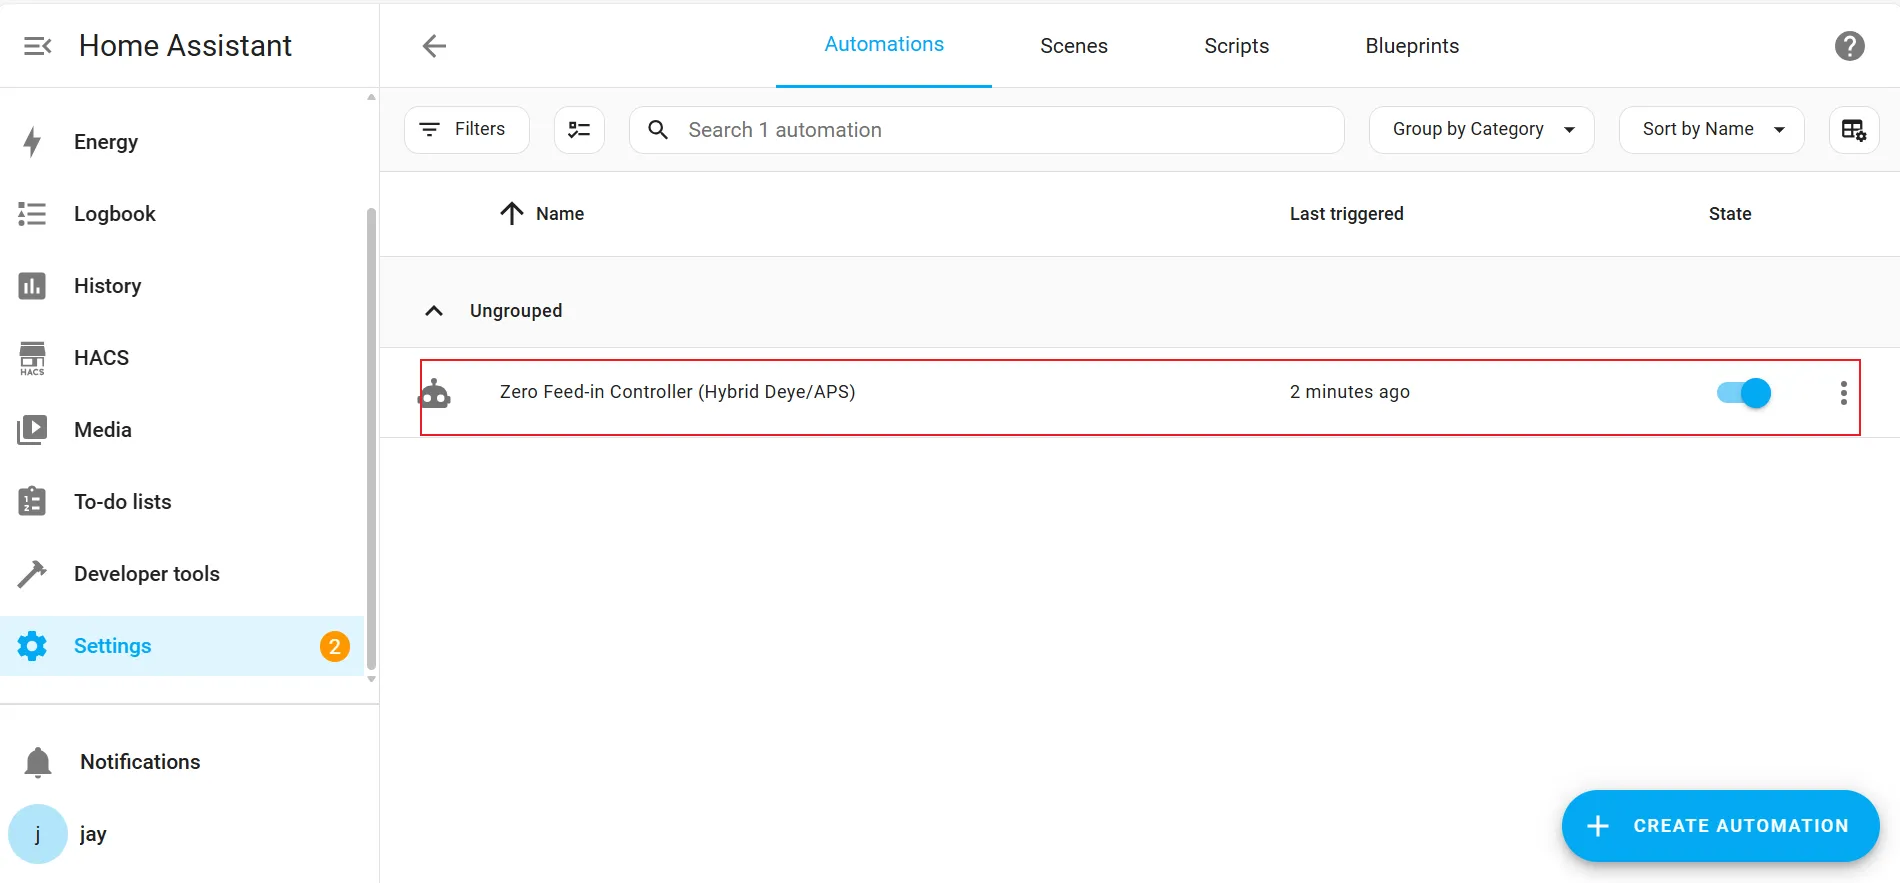
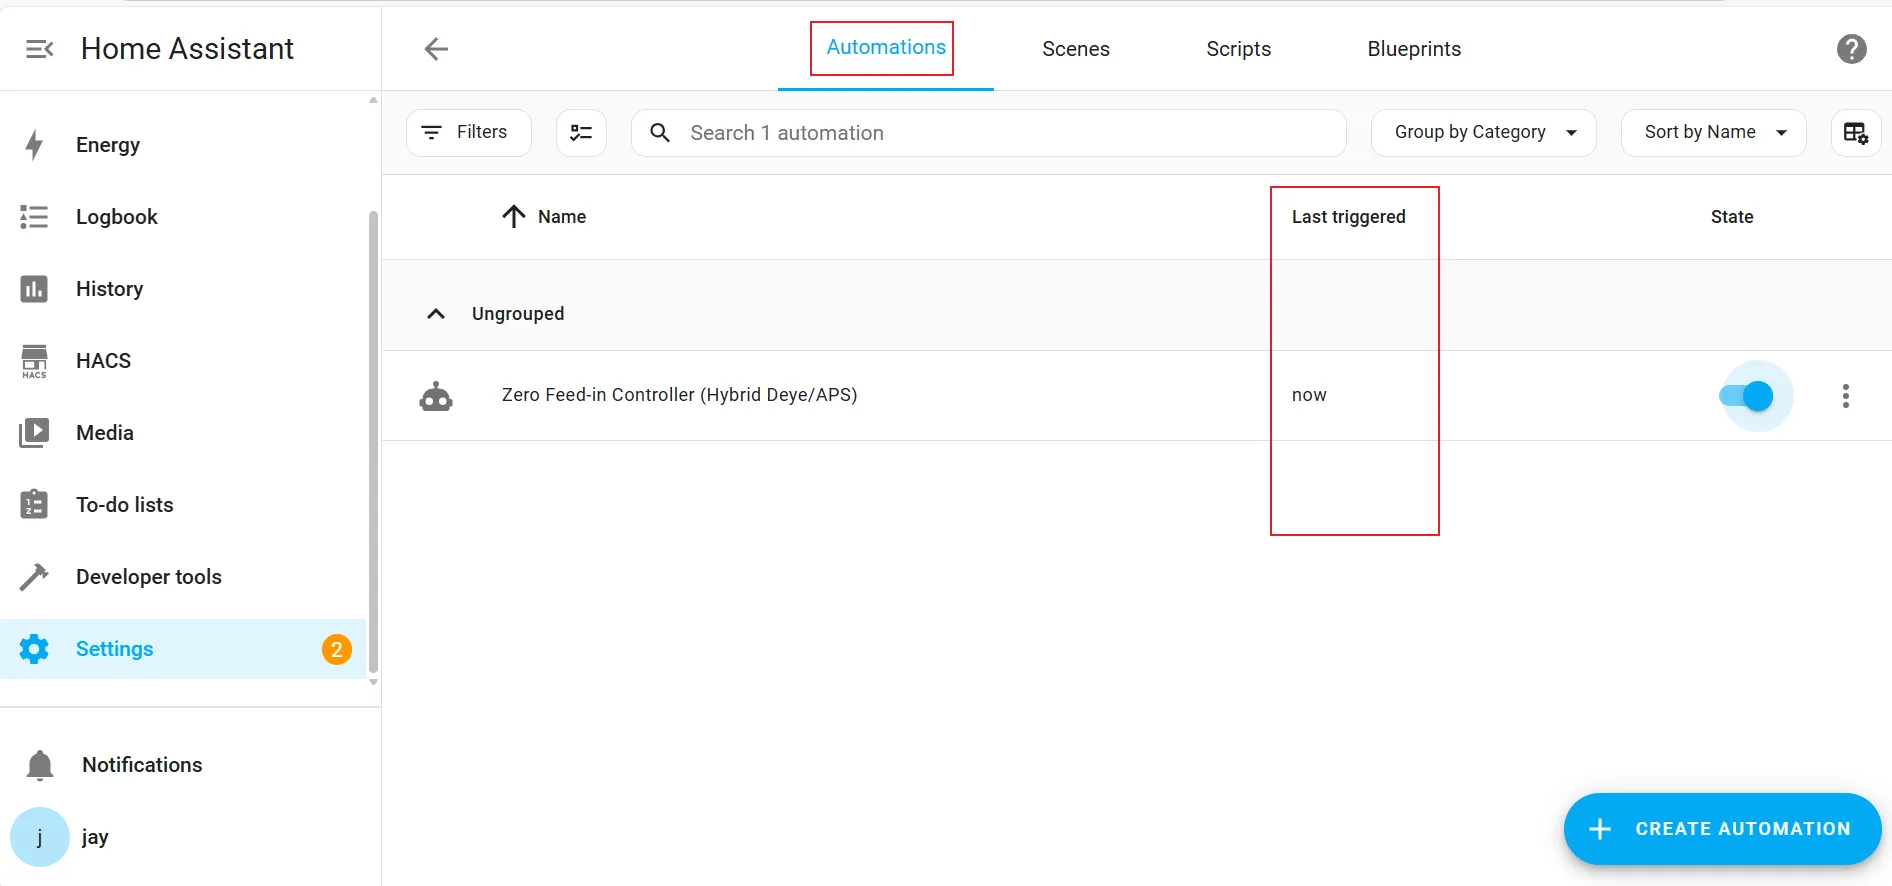
Step 6 | Check the status of automation execution
Method 1:
on the "Automations" page you may check the last trigger time of the created automation.