

Before You Begin
Please complete these items before creating the automation:
- Home Assistant is installed and onboarded.
- The SunEnergyXT 500 or SunEnergyXT 500 Pro integration is installed, and the device is visible in Home Assistant.
- An external meter is available in Home Assistant, for example Shelly, BitShake / Tasmota, EcoTracker, or another meter integration.
- The SunEnergyXT device, external meter, and Home Assistant are on the same local network.
Create the Automation
Install the blueprint
Copy the Home Assistant import URL below. In Home Assistant, open Settings → Automations & scenes → Blueprints → Import blueprint, paste the URL, preview the blueprint, then import it.
Home Assistant import URLCopy the English blueprint URLDetailed settings referenceOpen the full blueprint documentationFor manual installation, download the YAML file and copy it to /config/blueprints/automation/sunenergyxt/. Then reload the Blueprints page.
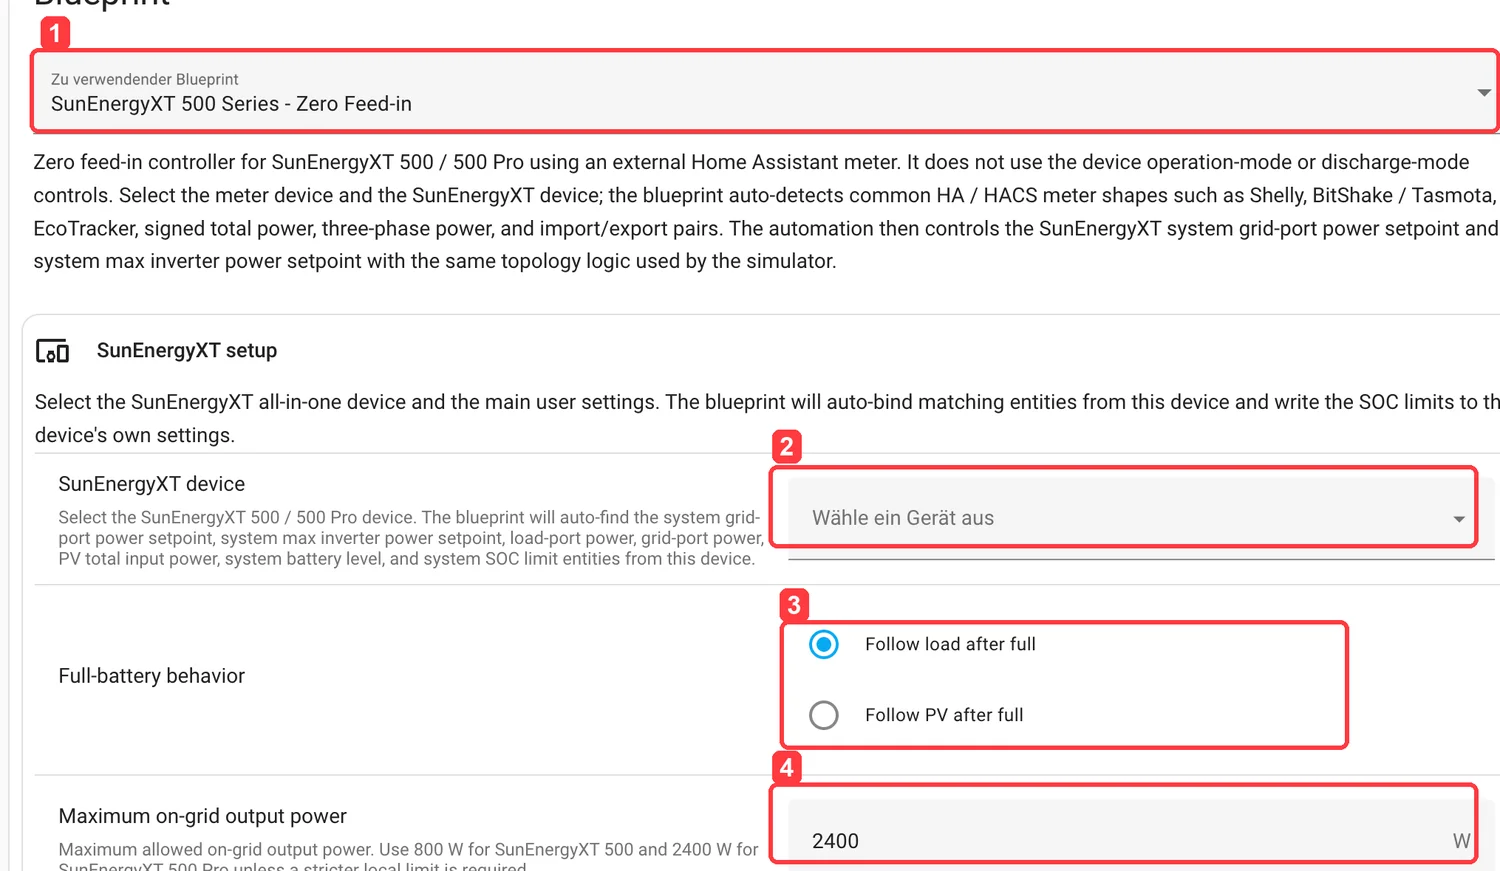
Step 1 | Select the correct blueprint
After import, open Settings → Automations & scenes → Blueprints. Search for SunEnergyXT and select SunEnergyXT 500 Series - Zero Feed-in.

Step 2 | Configure SunEnergyXT setup
Select the SunEnergyXT device, choose the full-battery behavior, and set the maximum on-grid output power. Use 800 W for SunEnergyXT 500 and 2400 W for SunEnergyXT 500 Pro unless a lower local limit applies.
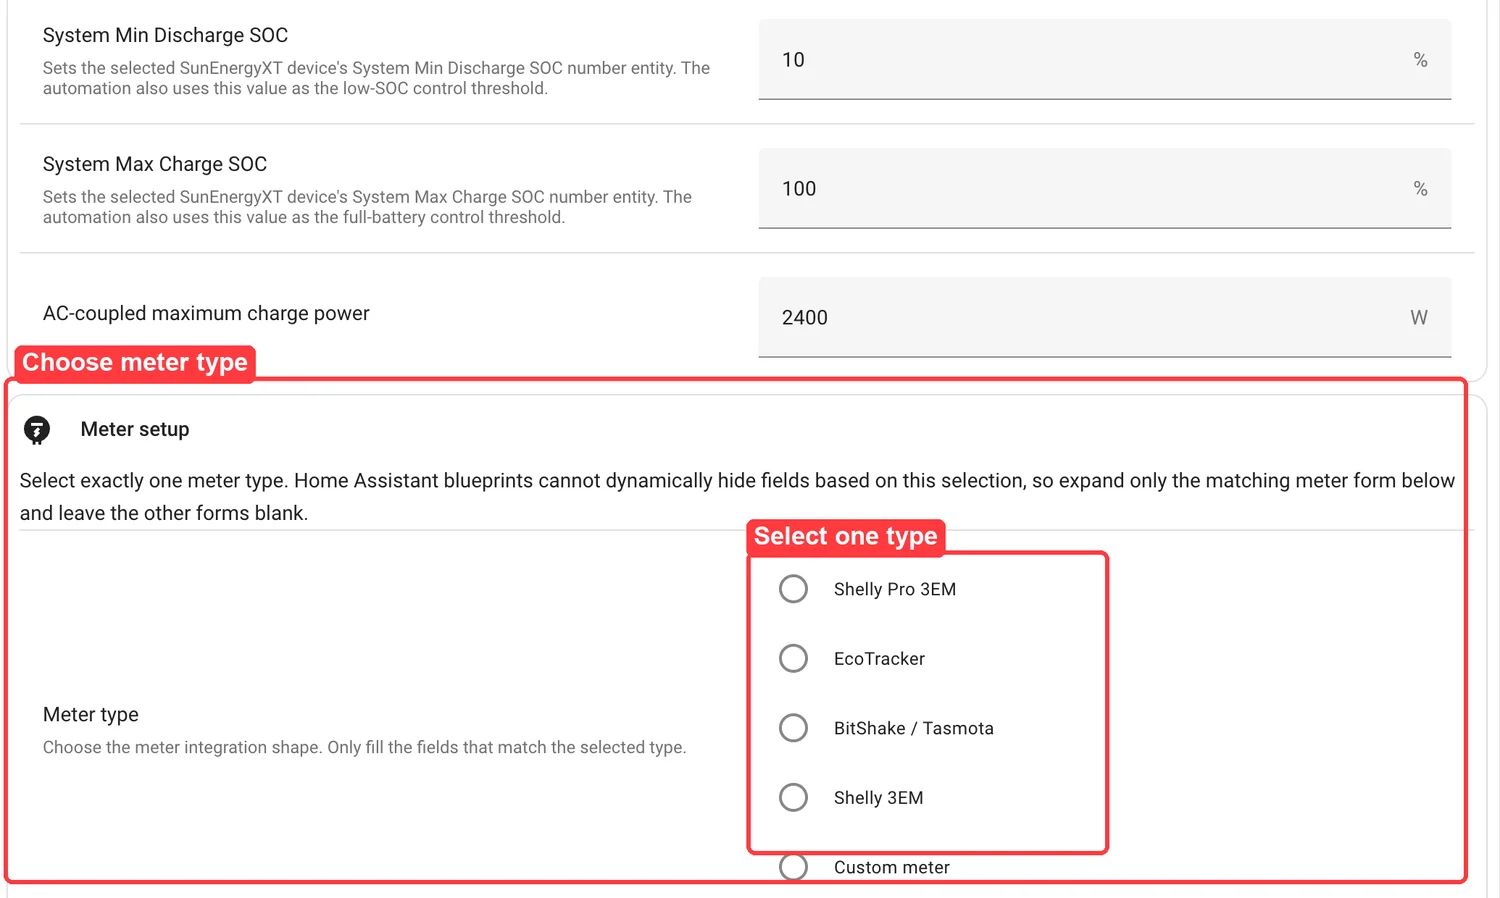
Step 3 | Set SOC limits and choose one meter type
Set System Min Discharge SOC, System Max Charge SOC, and AC-coupled maximum charge power. Then choose exactly one meter type.
Only fill the meter form that matches the selected type. Leave the other meter forms blank.
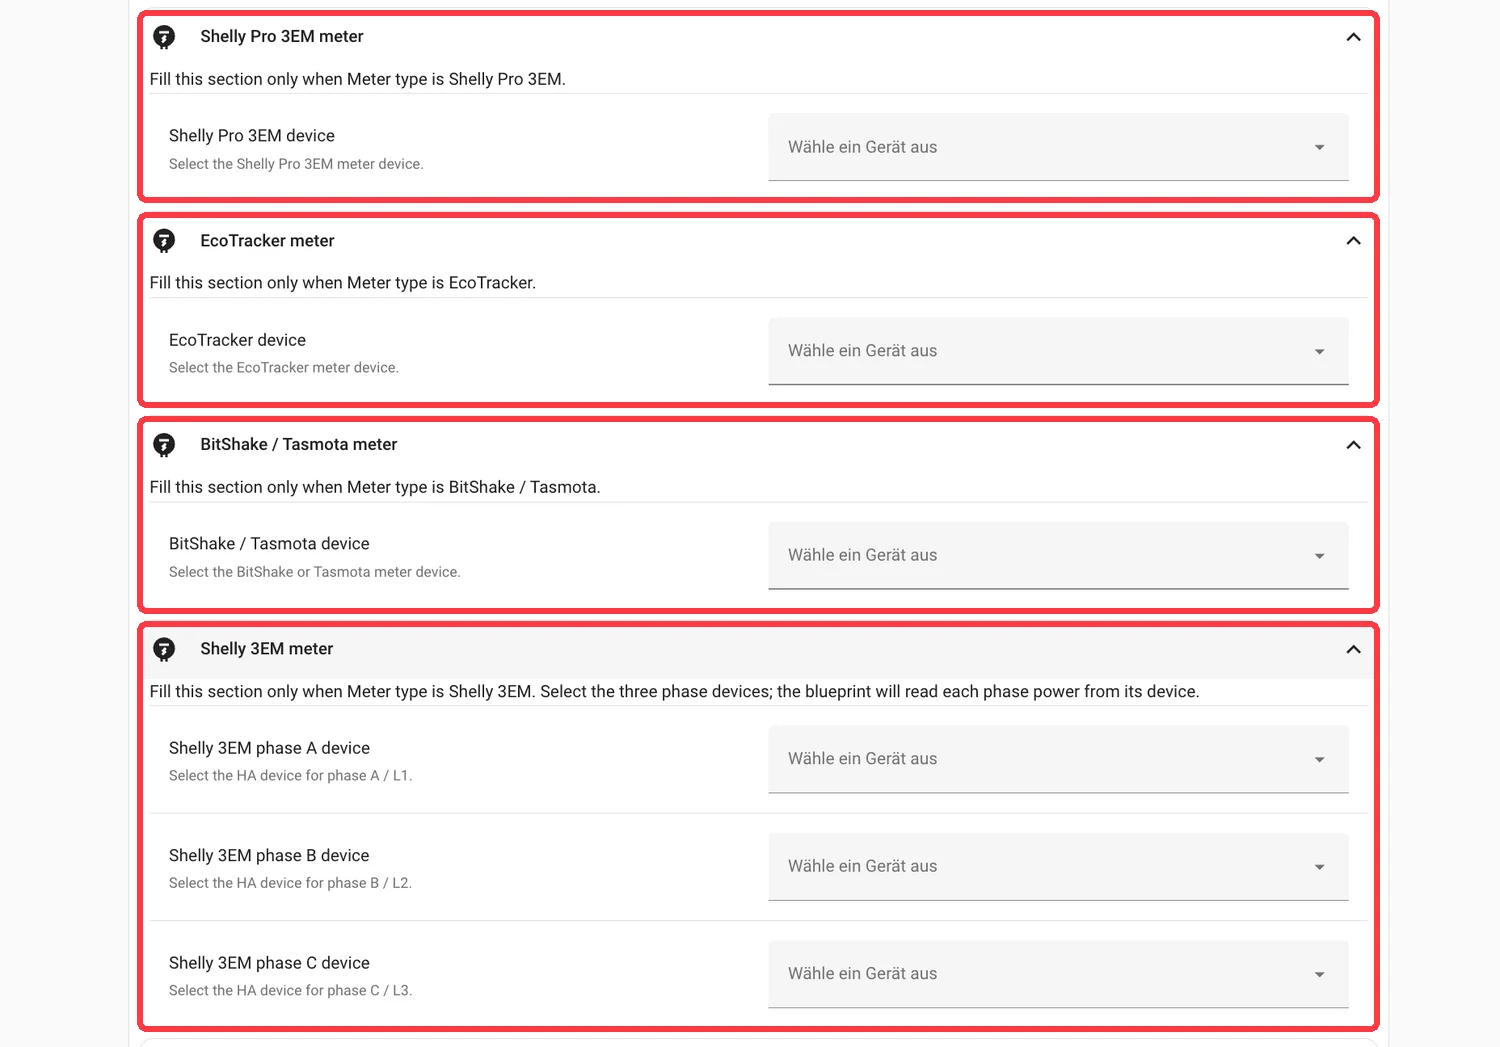
Step 4 | Fill the matching meter section
For Shelly Pro 3EM, EcoTracker, or BitShake / Tasmota, select the matching meter device. For Shelly 3EM, select the phase A / B / C devices.
Step 5 | Save, enable, and verify
Save the automation and keep it enabled. Watch the external meter value; it should move toward the target grid power.
For advanced control parameters, sign/unit overrides, custom meter formulas, and troubleshooting details, use the full blueprint documentation.
Troubleshooting
- If the correction moves in the wrong direction, check Meter sign convention.
- If nothing changes, check whether the selected SunEnergyXT device and meter device are online in Home Assistant.
- If you use Shelly 3EM / Pro 3EM, make sure the matching meter form or preset is selected.
- For advanced parameter details, open the full blueprint documentation.