

Enable local mode on the APS inverter and get the device IP
Download and install the AP EasyPower app from the Google Play Store.
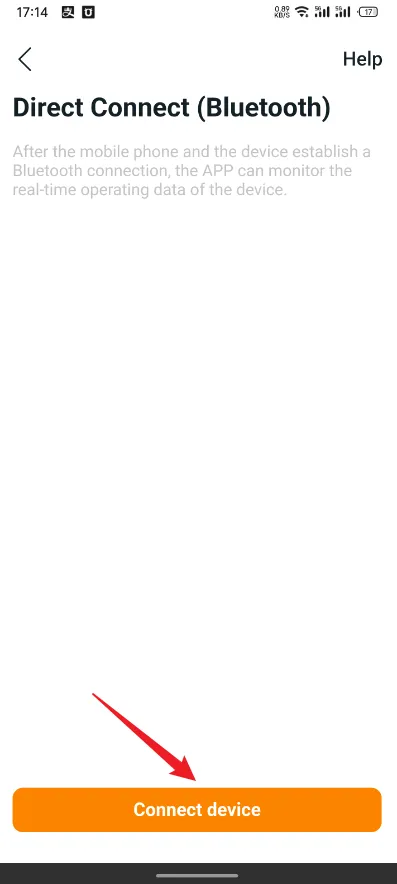
Open the AP EasyPower app, go to the login screen, and click "Direct Connect".

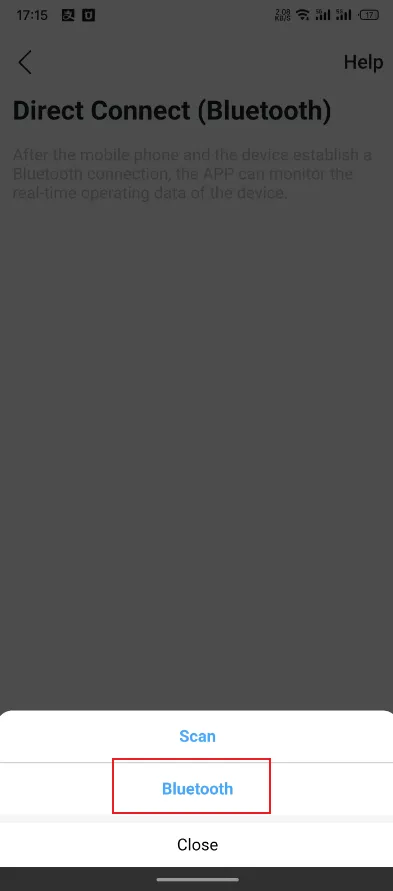
Click "Connect device", then "Bluetooth" and wait for your APS inverter to be detected.
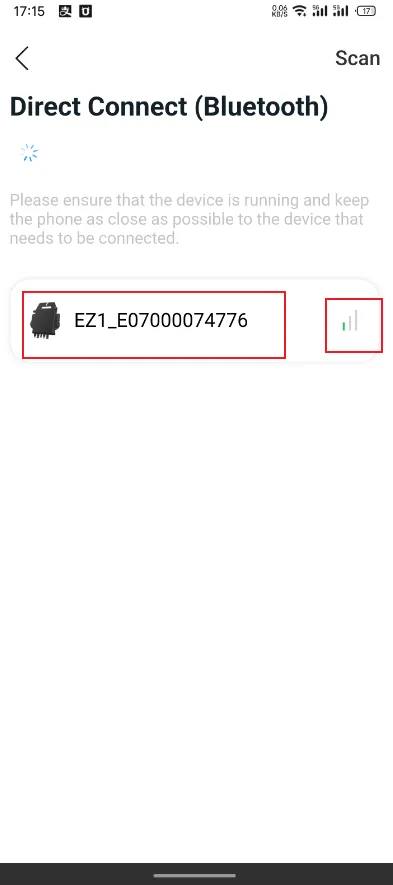
Select your APS inverter and wait for the connection to succeed.

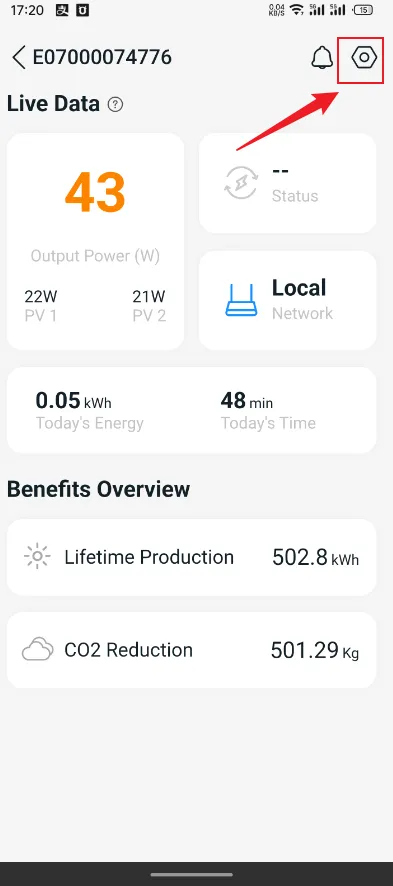
Click the Settings icon.
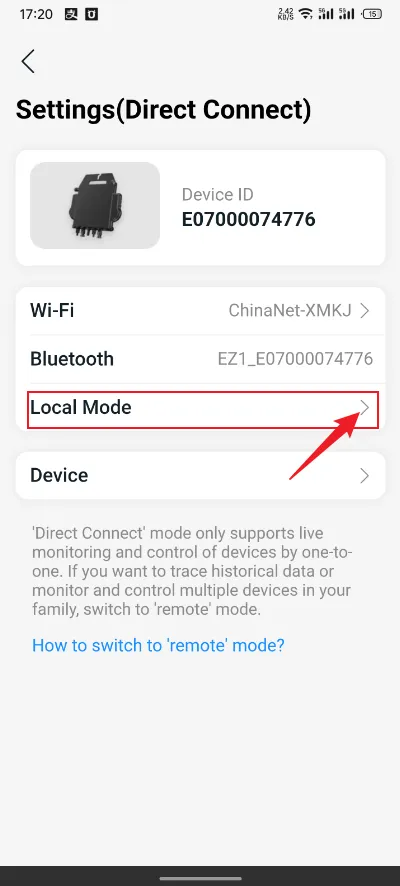
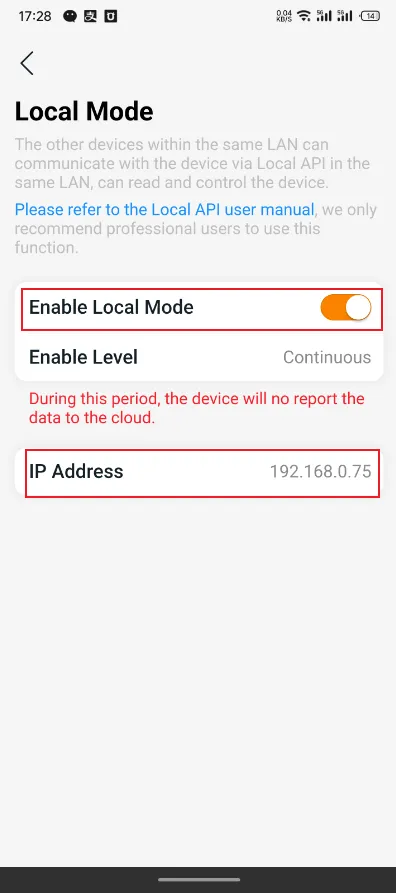
Click “Local Mode”.
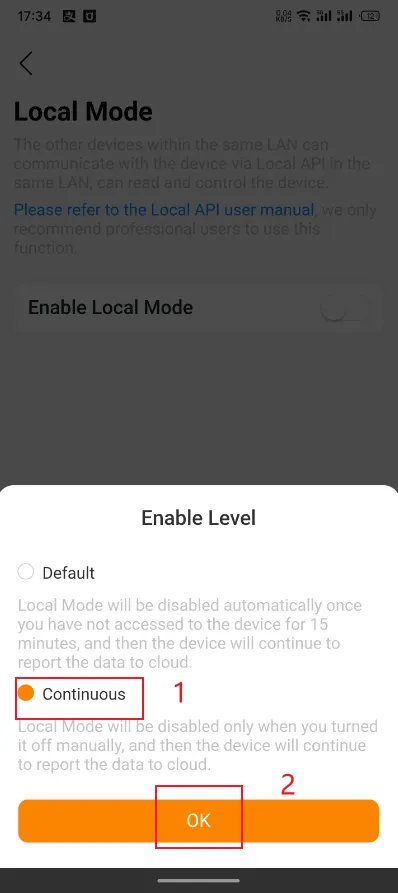
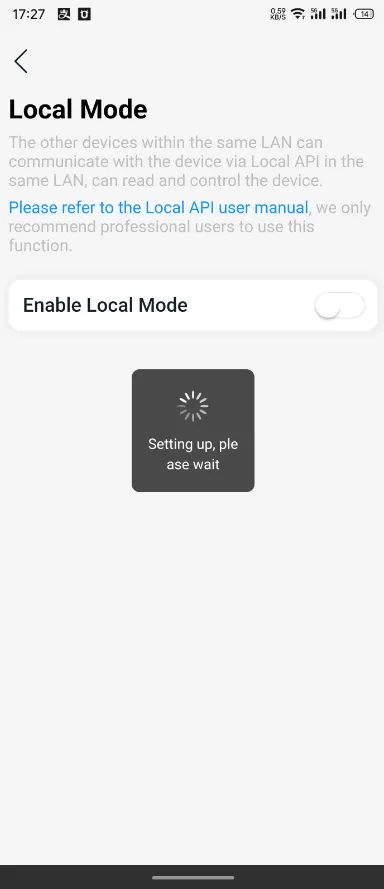
Click the switch to enable local mode, select "Continuous", then click "OK". Wait for the mode to activate successfully.

The APS Inverter have to be set up and connected to the same local network as Home Assistant (HA)
Integration steps
To make the integration process more convenient, we recommend using a PC to complete the integration. After completing the integration, you may view any device information via either your mobile device or PC.
Step-1 | Access the Home Assistant user web portal.
Open your computer browser and visit http://homeassistant.local:8123 to access the Home Assistant user web portal.
Step-2 | Integrate APS Inverter into Home Assistant.
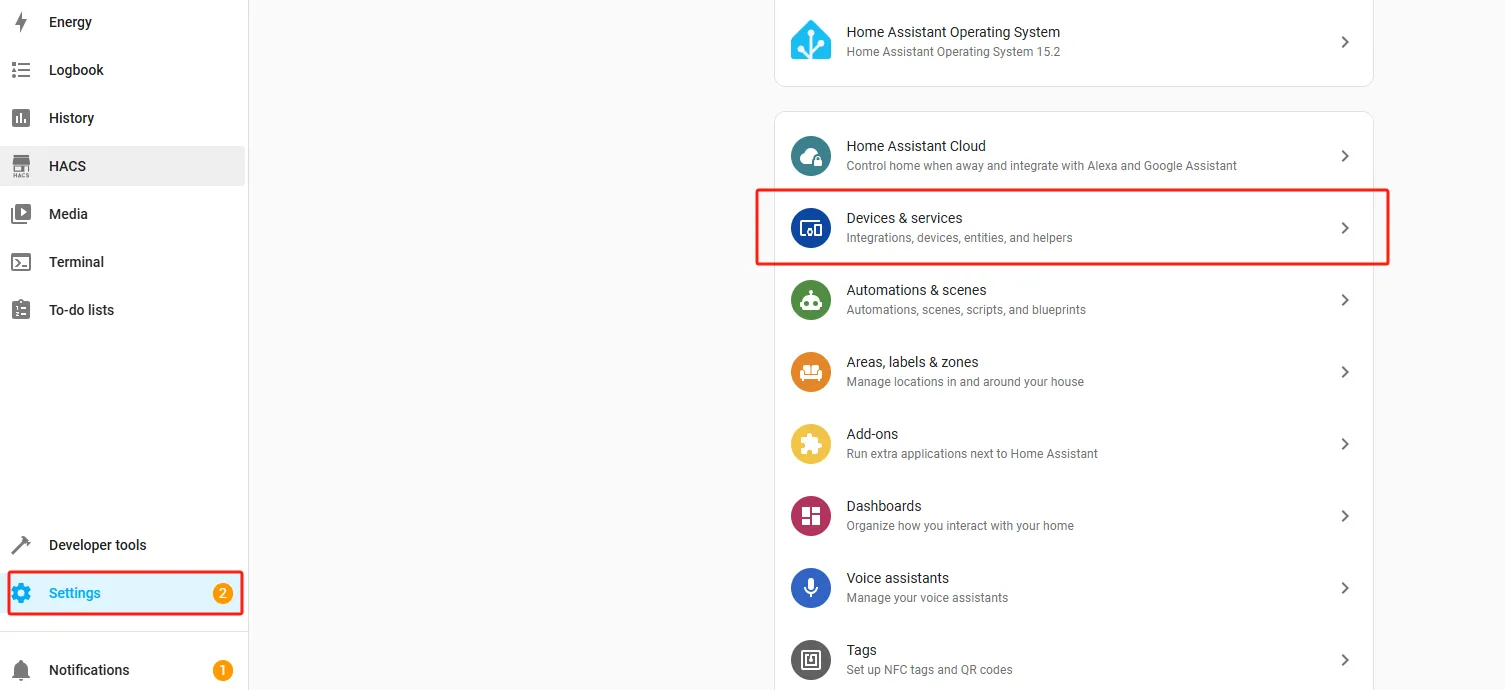
1. As shown in the image: Select "Settings" on the left side and then click on "Devices & services".
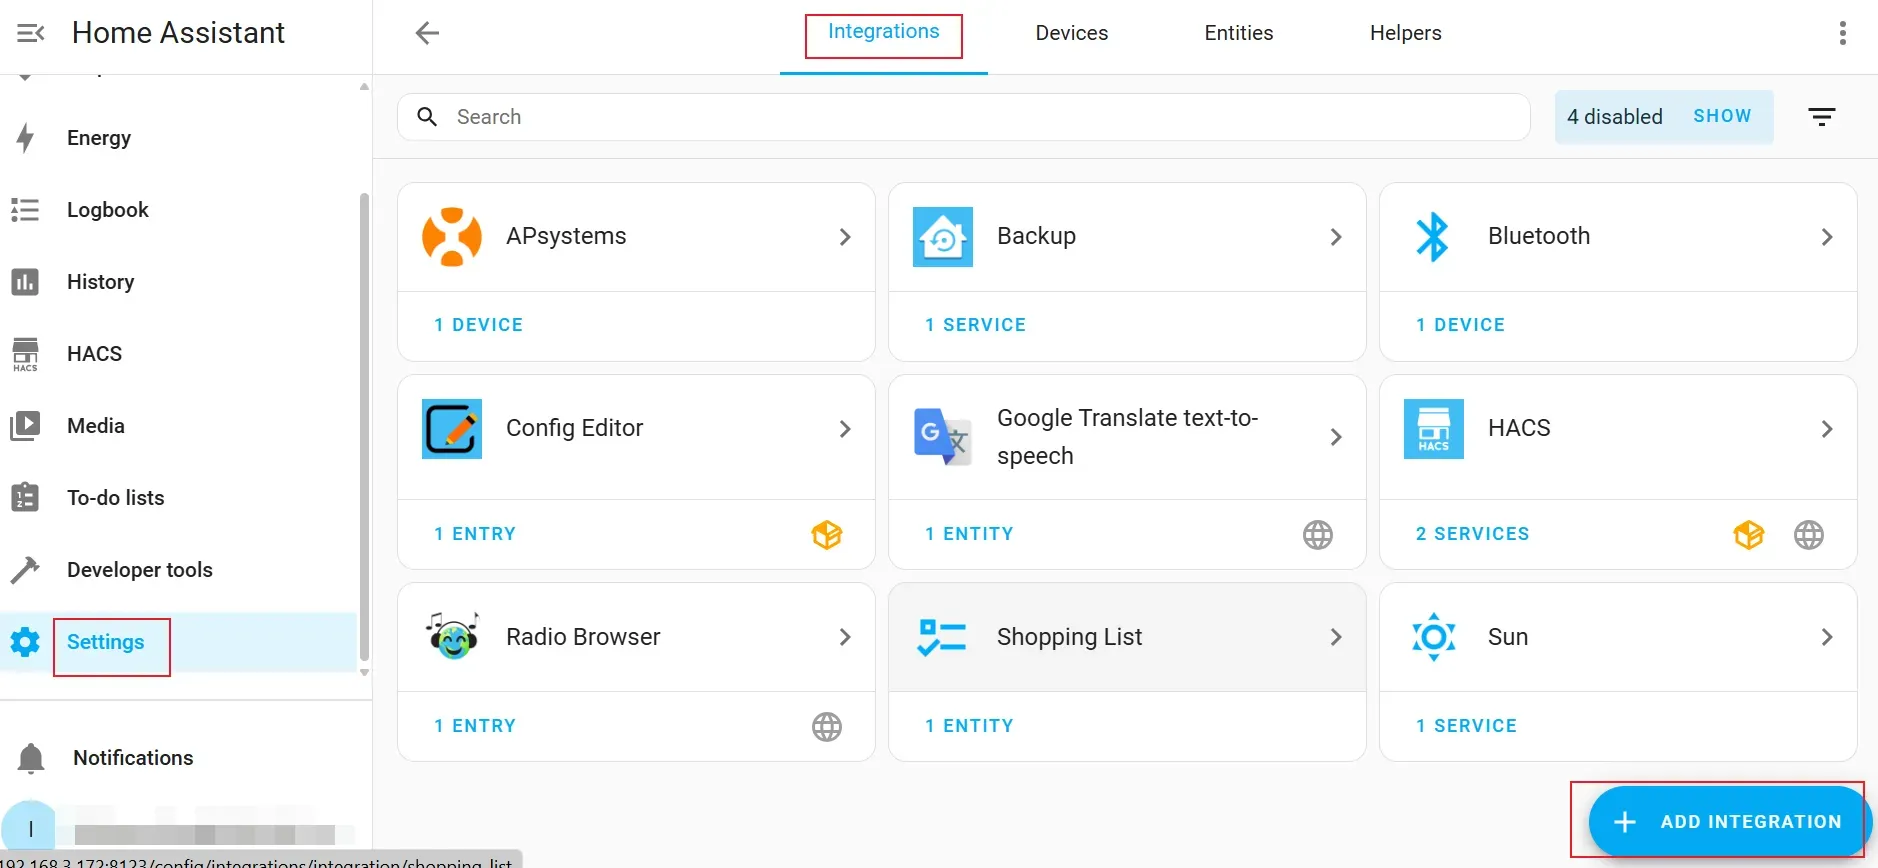
2. As shown in the image, select "Integrations" at the top and then click on "Add INTEGRATION".
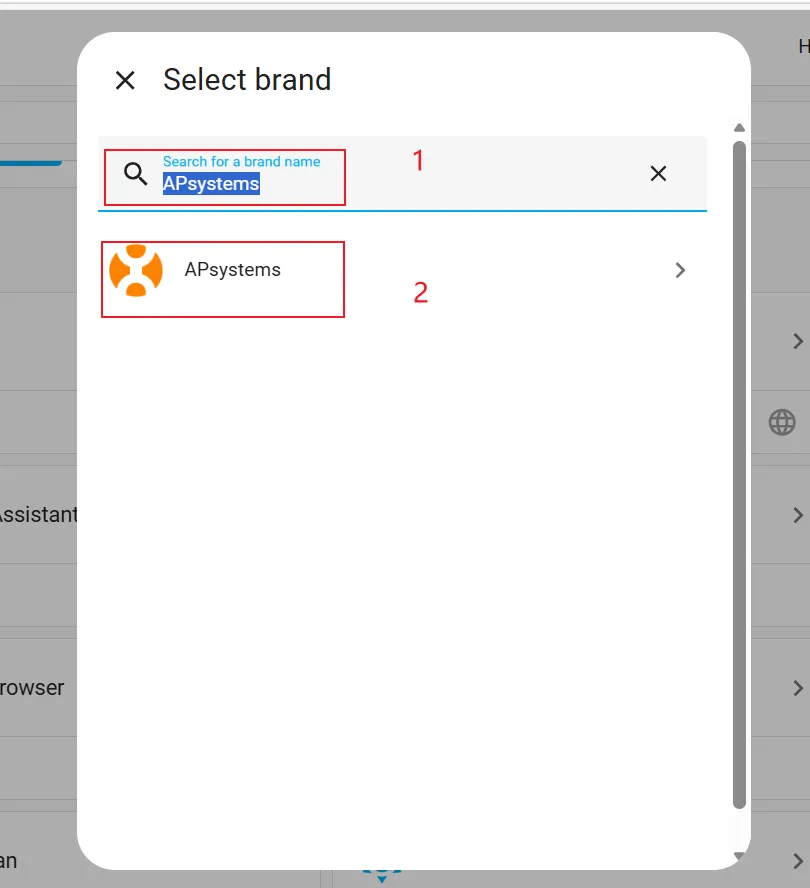
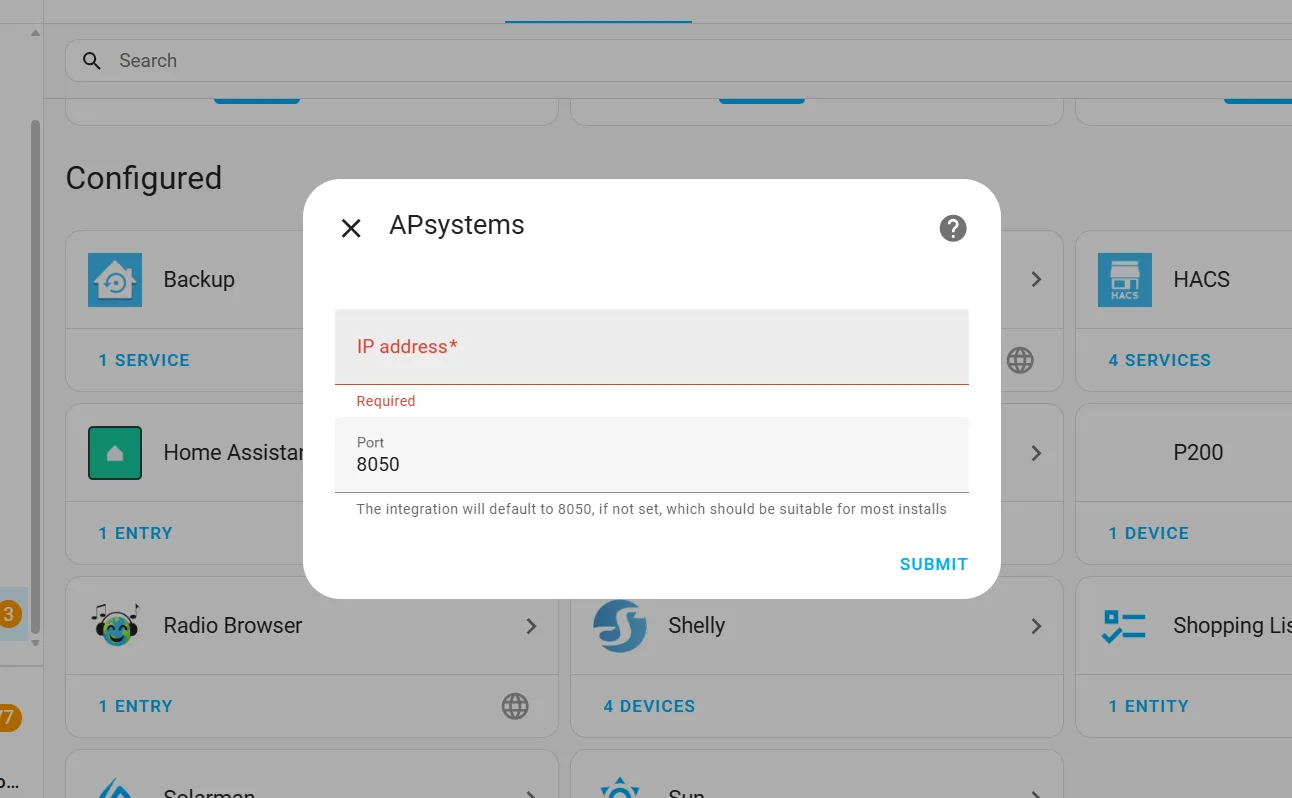
3. Enter "APsystems" in the search box and click on the "APsystems" card.
4. Fill in the required information below and click on "SUBMIT" after completing the form.
Host: your APS Inverter IP address
How to enable local mode on the APS inverter?- Port: 8050
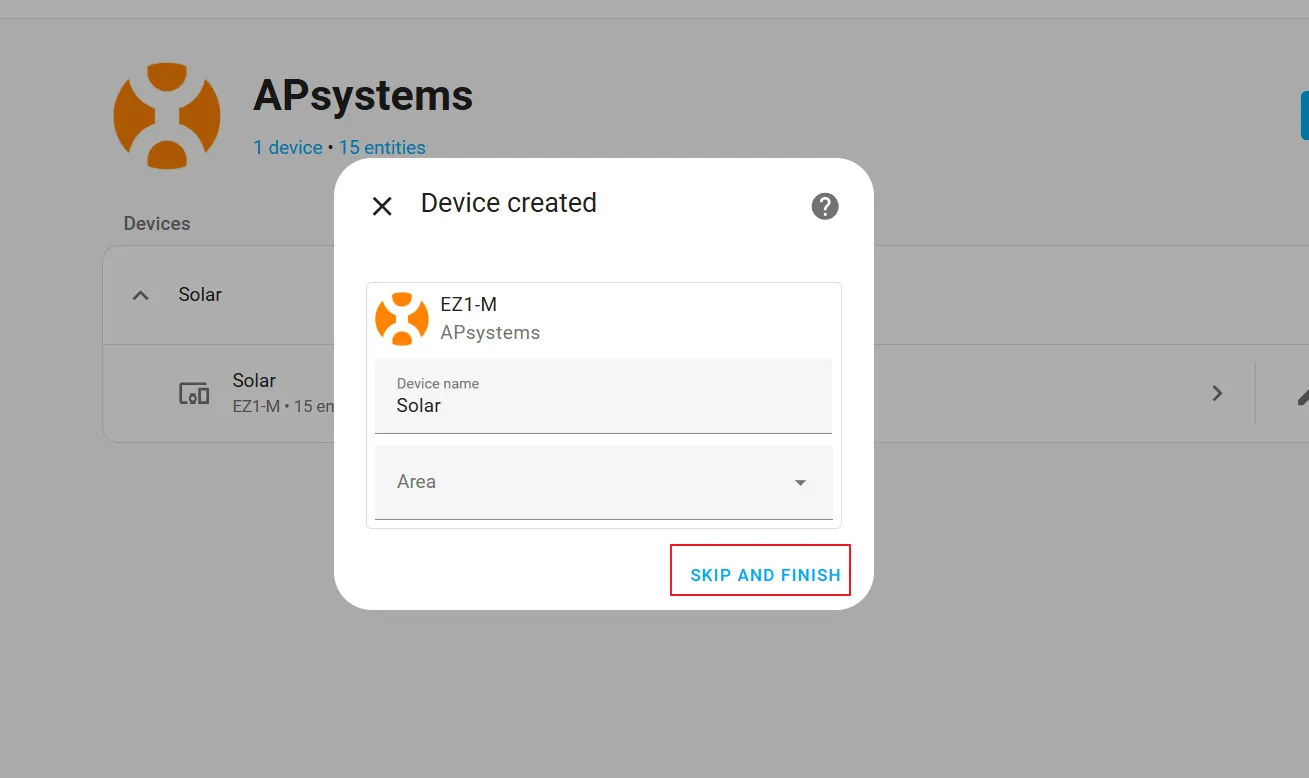
5. Select “SKIP AND FINISH” in the pop-up window and complete the integration.
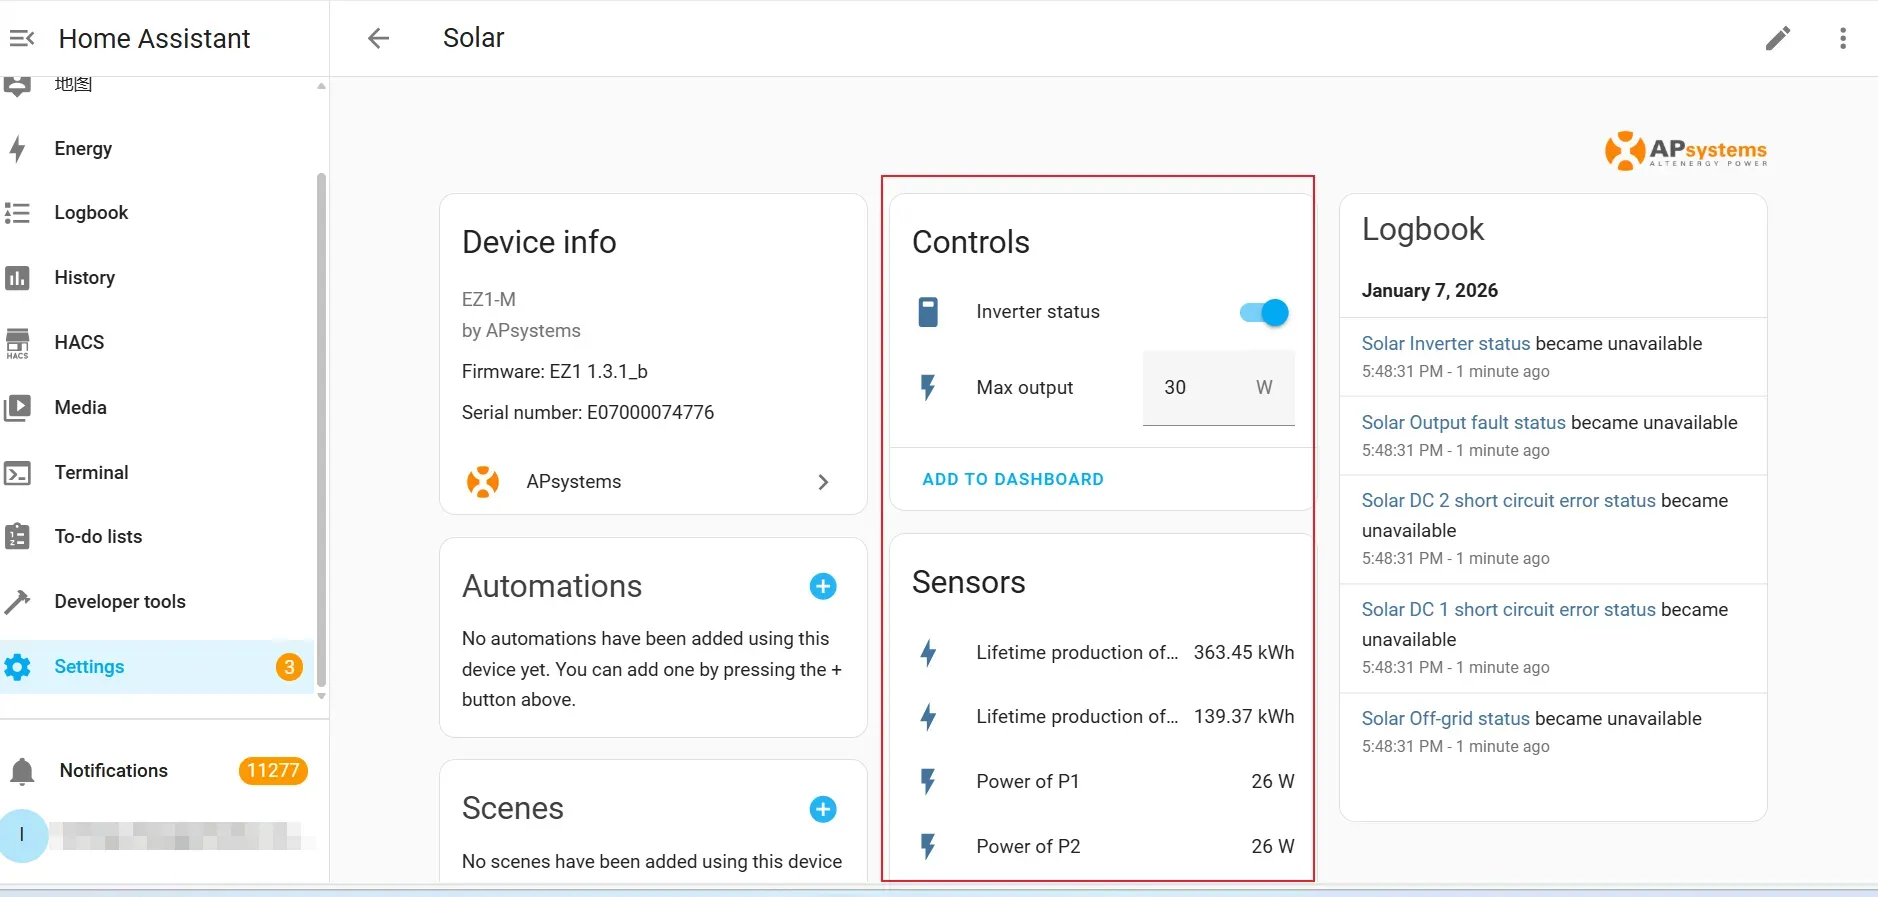
6. The highlighted area in the screenshot shows the relevant data information.